Slider

Rock and Republic Makeup on 50% Sale at BeautyStory/Editor's Closet Now!

Tuesday, August 3, 2010

3 comments
I just got 2 Rock and Republic blushes (Spank and Seduce) in the mail, and I'm thinking I might want one more....Those blushes are awesome! Sale is invite-only, and they only ship to USA and Canada, so you'll need to click on my link to check it out. It's 50% off, so click HERE to sign up and check it out! There's a code for an extra $10 off going around, BTYROCKS10 so don't forget to use that too! And there's ANOTHER code going round for $15 off, BTYTHX1115 so you can place two orders, one with each code!

(I am not affiliated to or compensated by any of the companies mentioned. The signup link provided is my own members' signup link.)

NOTD: Nubar Petunia Sparkle: It's Freaking FUSCHIA?!

Monday, August 2, 2010

11 comments
I bought Nubar's Petunia Sparkle, thinking it would look like a nice bright purple. Because that was what ALL the swatches I saw on blogs showed me. Purple. Straight-up purple. Nevermind that Nubar's own swatches showed a pink - I was thinking, bloggers don't lie, right? And they're usually much more accurate than lousy website swatches.

WRONG. In this case, all of you lied to me! :P But I don't blame you guys - it's just one of those polish that's a major PITA to photograph accurately, as I soon found out for myself.

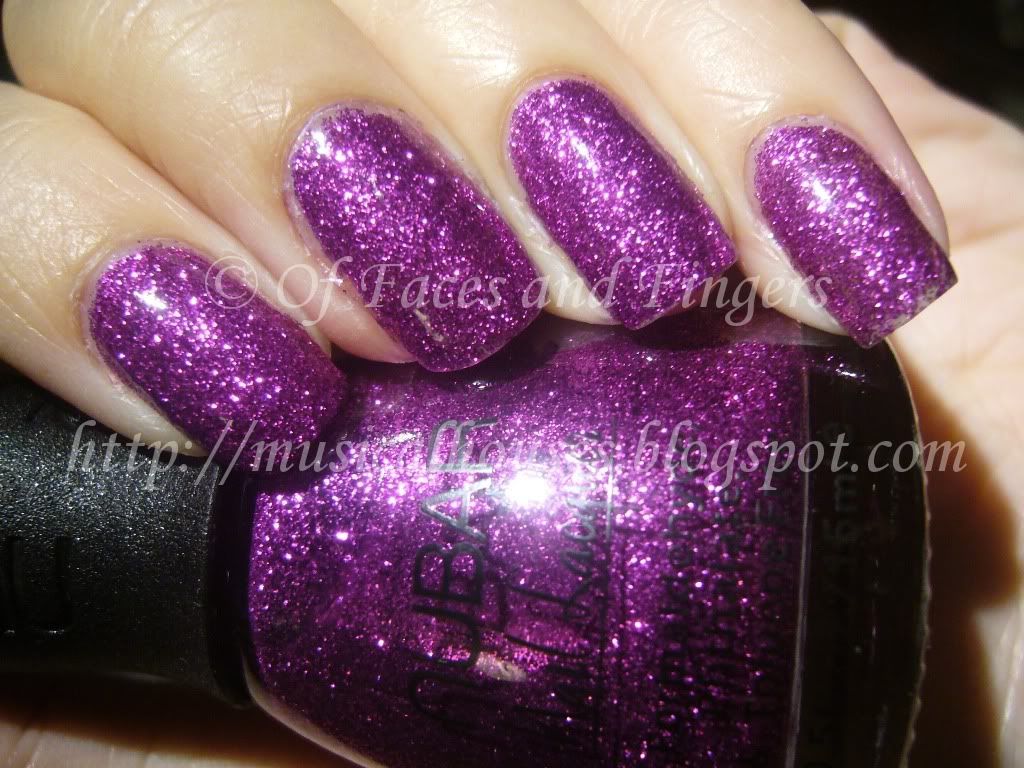
See, when I took my photos of Petunia Sparkle, they all turned out like this:

Nubar Petunia Sparkle

Looks purple, right? That's the colour I saw in all the blog swatches I was reading, and that's the colour I thought I would get when I bought it.

But noo, it doesn't look like that at all - definitely not on me, at least. On me, it's more of a hot fuschia colour. Like, bright fuschia. Almost-neon-but-not-quite-but-still-full-of-bling fuschia.

This is how it REALLY looks like on me. And while I rarely edit my photos (I never photoshop them, although I do occasionally edit indoor photos for colour accuracy) I had to colour-edit this one picture below, because it was necessary. Despite my 2343252523 shots of Petunia Sparkle, it just kept showing up purple on my camera. But on me, it's not purple at all. It's really a lot more pink, a lot less purple, but still really hot.


See, see, see? I told you it was necessary, right? I know purples tend to photograph blue most of the time, and usually I can visually compensate for that, but somehow for this colour, it photographs so much bluer that the colour seems to be a different colour altogether! Of course it's still one hot sizzling colour - but when I bought it, I was really expecting it to be purple, not pink.

And it's really funny, because there I was thinking, "All those bloggers lied to me!" But when I tried to photograph it myself, ALL of my shots turned up purple, forcing me to resort to colour-editing. But I colour-edited them because I just wanted to show you guys what the colour really looked like on me. I don't want anyone who might buy nail polish based on my photos thinking it's a purple, because on me it's definitely fuschia!

(Before anyone starts thinking that I'm one of those bloggers who photoshops my cuticles and erases my pimples, I'd like to state my blog policy on photo-editing. My policy on photo-editing is that I do it to enhance colour accuracy, and that's it. I don't edit anything other than colour, period. I don't make my cuticles look neater, or my face look more contoured, and if you look my photos I think that's pretty obvious. It's a distinction I'd like to make clear, because I am indeed aware of the controversy that could potentially surround a post like this.)

Beauty Blog Link Love

Sunday, August 1, 2010

3 comments
Have you ever tried epilating? Well, now Rae has -- and she just loves her new Emjoi Emagine!

Vote NOW on what Makeup Series you'd like to see next on Betty Girl Makeup. Poll closes Friday, August 6th @ 11:59pm.

Jellyminx shows a summery golden pink look and features a surprise guest!


Kim Porter swatches products from the MAC In The Groove Collection to show you what it looks like on NC50 skin.

Krasey Beauty has exclusive swatches of the new Make Up For Ever Lab Shine Collection.


Rachel's been trying out new mineral makeup from Lily Lolo over at Queen of Turquoise.

Hot Beauty Health shares a list of the top 10 virtual hairstyle and makeover sites to try out a new look!

Musicalhouses makes Illamasqua's Beg blush wearable in her latest FOTD.

Find out everything about Summer 2010 makeup trends in the Makeup4All on-line beauty magazine.

Joeybunny over at the PinkSith blog tells us what worked and what didn't during her testing of Raw Minerals Makeup and Brushes. Did you know she's a Team Jacob and not a Team Cullen?

Jolie Laide Girl gets all hot and bothered playing with the Urban Decay Naked Palette.

Check out what makes Guerlain's Meteorites Perles primer so special on Beauty Addict.


Fed up of struggling to access your new makeup? Yeah... Lipglossiping is, too!


Christelle from Beauty Crazed learns that multiple X's are not always inappropriate... sometimes they mean mascara!

I Heart Cosmetics has become totally obsessed with the Clarisonic.

***


Retrodiva is giving away the brand new Sampar's Good Weekend Kit, a new travel-friendly kit for urban skin survival.

Win an Infiniti by Conair You Curl curling iron from Audrey Dao.


There's still time to enter the Summer Smooth Skin Giveaway at The Gloss Menagerie!

Got troublesome skin? Enter Hellcandy's skincare giveaway for the chance to win some B-Liv products!

Do you want a new traincase? CSN stores is giving one Spiced Beauty reader a $40 gift card!

How to Fix a Broken Nail With a DIY Tea Bag Wrap

Friday, July 30, 2010

60 comments
There I was, opening the freezer door to get some food. I was hungry, therefore I was impatient, and therefore I wasn't really thinking too much about what I was doing. While opening the freezer door, my fingers slipped off the door handle - except my third finger, which caught onto the door handle. I felt a snag on my finger and a bit of pain, and it took me a few seconds to realize that I had just torn my nail.

I was so upset I had to Twitter about it, and my non-nail fanatic friends were laughing at me because they thought it was so funny that I could get so worked up over a nail. But you know how it is with these things. You spend months growing them out, shaping them, caring for them with hand lotion and cuticle cream, and then, just when you think "My nails don't look like rubbish after all", they tear. It's heartbreaking, really, because if you trim them all the way down after a tear, you start from scratch, all over again.

Have a look at the damage. The freezer needs to DIE. I'd have smashed it to bits, but it had three tubs of ice cream inside, and I didn't want to ruin the ice cream.


I didn't want to trim my nails all the way down and start from scratch again, so I decided to try a DIY wrap with a tea bag to hold the nail in place until it grew out. I don't do this very often, so my skills at making teabag wrap are really Noob-ish, so you'll have to put up with the lousy skills here.

You'll Need:
1. Nail Polish Remover or Acetone (swipe over nail before applying the wrap)
2. Cotton Pad (for swiping acetone over nail before application)
3. Nail Glue (not base coat or nail treatment)
4. Tea bags (cut to just slightly smaller than nail size)
5. Scissors (for cutting tea bag wrap to size)
6. Tweezers (for placing the tea bag wrap over your nail surface)
7 Orange Sticks (for holding down the wrap while they dry)
8. File or Buffer (for smoothing out the wrap after application)
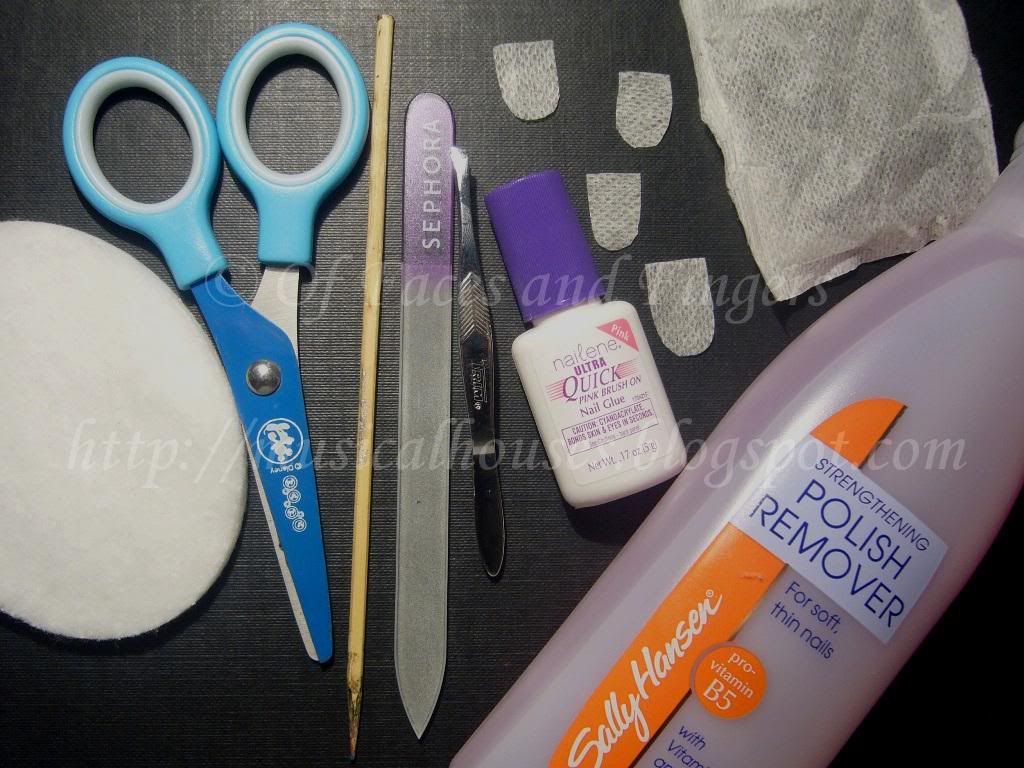


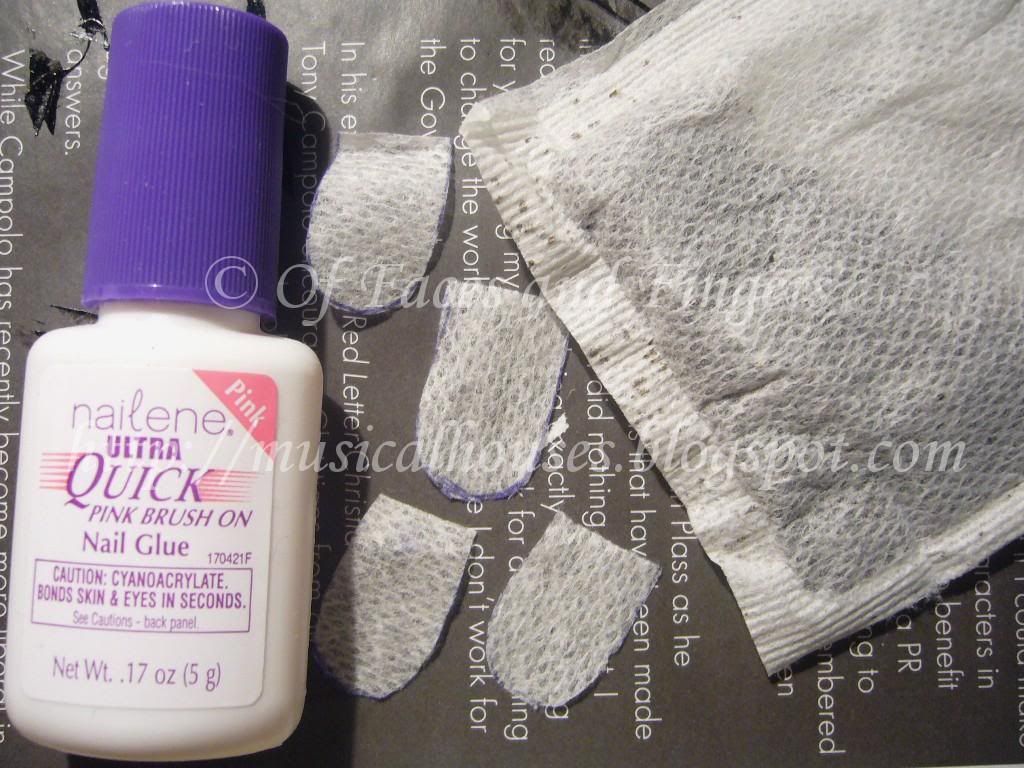
I'd like to point out that it HAS to be nail glue that you're using, as I had a question from a reader asking if she could use base coat or nail treatment instead. These weren't made to funtion as adhesives, so if you use them, the tea bag wrap won't stick to your nail. Any kind of nail glue will do, as long as it's a nail adhesive. I used the Nailene Ultra Quick Brush On Nail Glue, which dries fast, and also dries clear, which is useful if you don't want to sit around waiting for the nail glue to dry.

I also used a tea bag. Yup, your normal average tea bag. Cut it out to the size and shape of your nail. I just used a pen and a scissors for that. The cutouts here shown are the actual shape of my nail, but before you apply them you might want to make them a bit smaller than your actual nail size, so that you don't accidentally glue down the wrap onto the skin around your nail (which was what I did).


Step 1:
First, swipe your entire nail plate with acetone or nail polish remover. This helps get rid of the oils on your nails and helps the wrap adhere to your nail more securely.

Step 2:
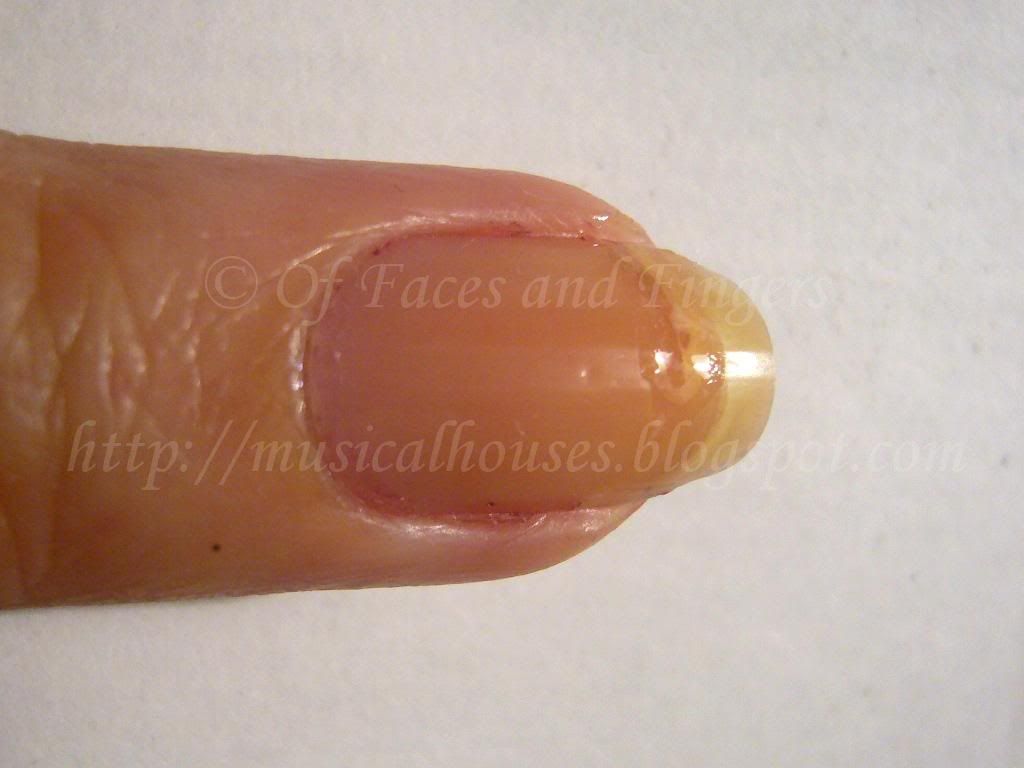
Seal the tear with a bit of nail glue. You don't have to do this if the tear is small, but for a huge tear where the torn bit doesn't stay in place and might move around, it's a good idea. I think I put a bit too much here. You only really need a little bit to seal the tear. Too much and it will cause a bulge on your nail, which will make it harder to apply the wrap on top. You want to keep the surface flat so the wrap goes on more easily:


I don't have pictures for the next couple of steps, because you have to work quickly, so there wasn't time to stop and take photos.

Step 3:
Apply nail glue over the entire nail. Leave a little gap at the sides and at the base of the nail, near the skin and cuticles and the sides and bottom of the nail. This is important because you don't want to glue your cuticles or skin to your nail wrap!

Step 4:
Then, working quickly, use a pair of tweezers and place the nail-shaped tea bag cutout over your nail. Use tweezers, and not your fingers, or you will glue your fingers to your nail. And that's painful. (Um, not like I would know....*looks away and whistles*)

Step 5:
After the wrap is on the nail, use an orange stick to press down and hold the wrap in place while the glue dries. Remember, use an orange stick and not your fingers, or you'll get your fingers glued to your nail. This step will take a few minutes or longer, depending on how fast your nail glue dries. The important thing in this step is to make sure that there are NO air bubbles under your wrap, between the tea bag material and your nail. If there are any air bubbles, moisture could collect in them, and lead to bacterial growth, on the nail. So if you do see air bubbles, it's better to redo your wrap at this point. Better safe than sorry!

This is what my nail looks like at this point:
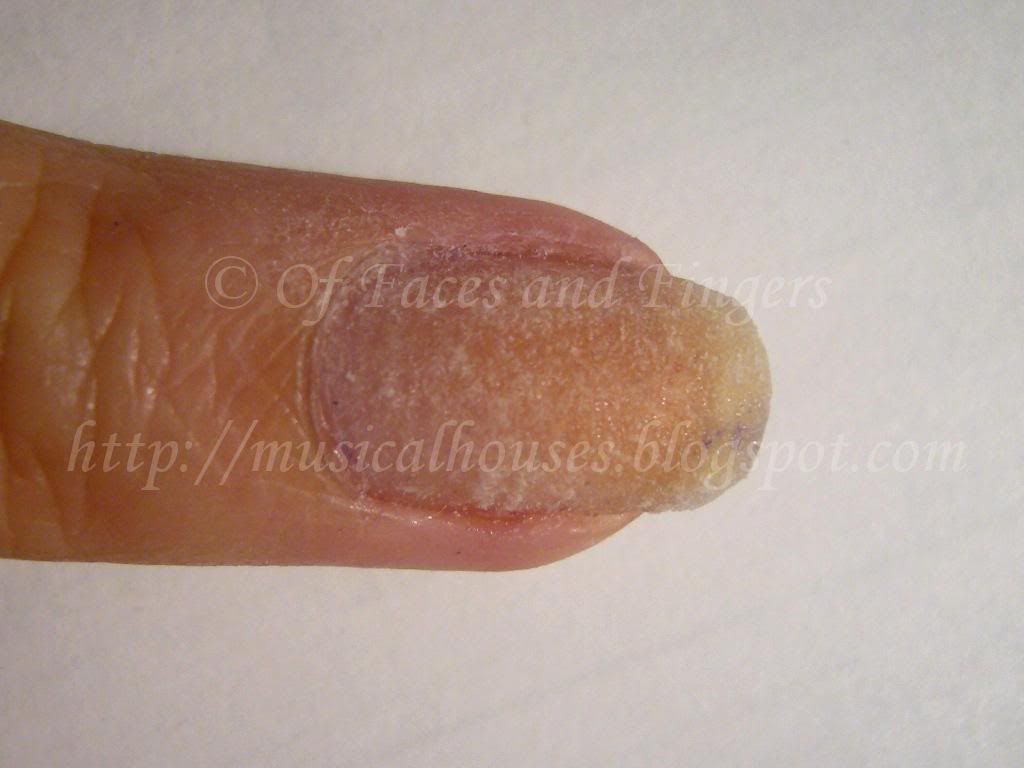


As you can see, I am a DIY nail wrap noob, and I glued my cuticles and skin to my nail wrap, because I accidently put too much nail glue and cut the size of the nail wrap a little too big. I ended up using a bit of nail polish remover to un-stick my skin.

Step 6:
Next, put another layer of nail glue on top, and let it dry. The nail glue will saturate the wrap and make it turn clear (or at least, clear-ish). This way, the wrap will be secure, and it won't look as obvious.

Step 7:
You're all done. All that's left is to lightly file or buff down the surface of your wrap to smoothen it out. Don't overdo it, or you'll end up buffing through the wrap. Once you're done filing or buffing, and you can proceed to paint your nails with whatever colour you want.

Here's a photo of the finished wrap (pardon the lint and the remnants of previous polish, this was a photo of the wrap taken later in between manicure changes):
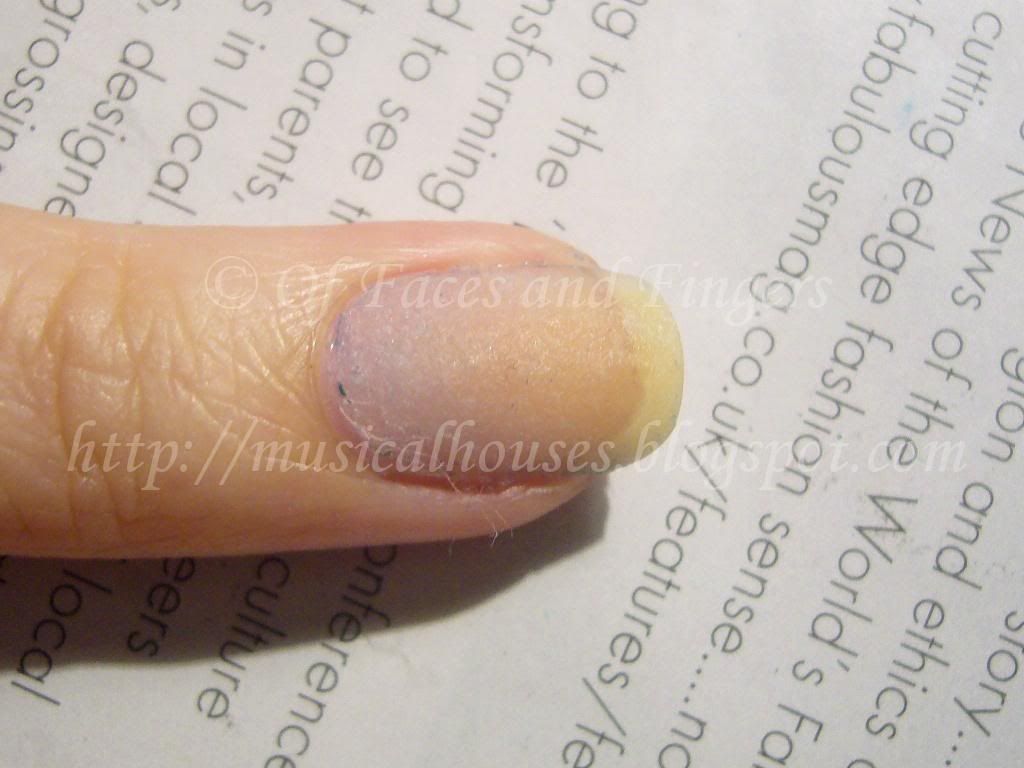


This wrap, noob-ish as it was, lasted me for around 2 weeks. Eventually I redid it because my nails were growing out, and for some strange reason a corner of the wrap chipped off. (Seriously, how does that happen?!)

Here's my fixed-up and pretty-fied nail. You can tell its the middle finger that broke, because the too-big wrap is sticking out from the sides of my nail. Oops.
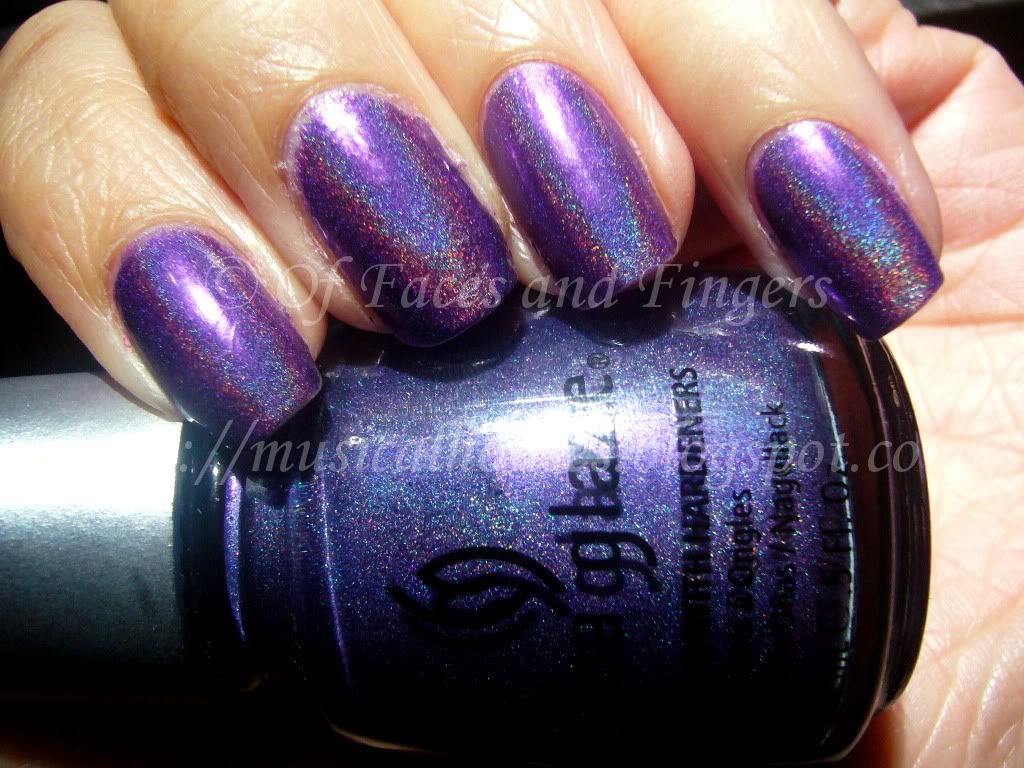


I love China Glaze LOL, it's an awesome royal purple holo. The only thing is that I feel sad about is that the holo effect was a little bumpy and rough on my broken nail, because the surface of the wrap isn't totally smooth, even after filing. And here's a slightly more flattering photo of my nails:
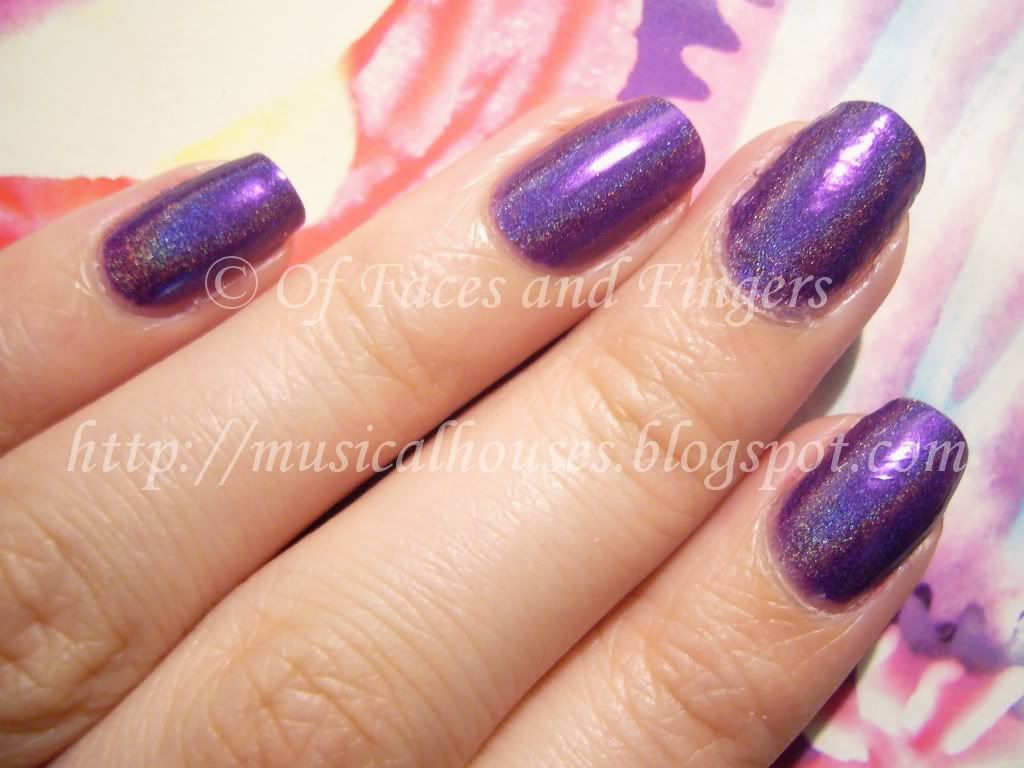


I guess this means I'm not going to be able to wear holos for the next couple of months until my tear grows out and I don't need the wrap :( And yes, this does mean that you'll see my nail wrap sticking out of all the next few NOTDs, unfortunately. They get less obvious as the wrap grows out, but I hope you guys can pretend it's not there! :X

FOTD: Illamasqua Beg and YSL Gloss Pur Pure Fuschia

Wednesday, July 28, 2010

6 comments
I realized that I don't have any posts on Illamasqua, despite owning a few of their products. Given that the amnesty is almost over, I figure I'd better squeeze in a couple of Illamasqua posts while I can! So today's Illamasqua post is a Face of the Day (FOTD) with my favourite blush of the moment, Beg.

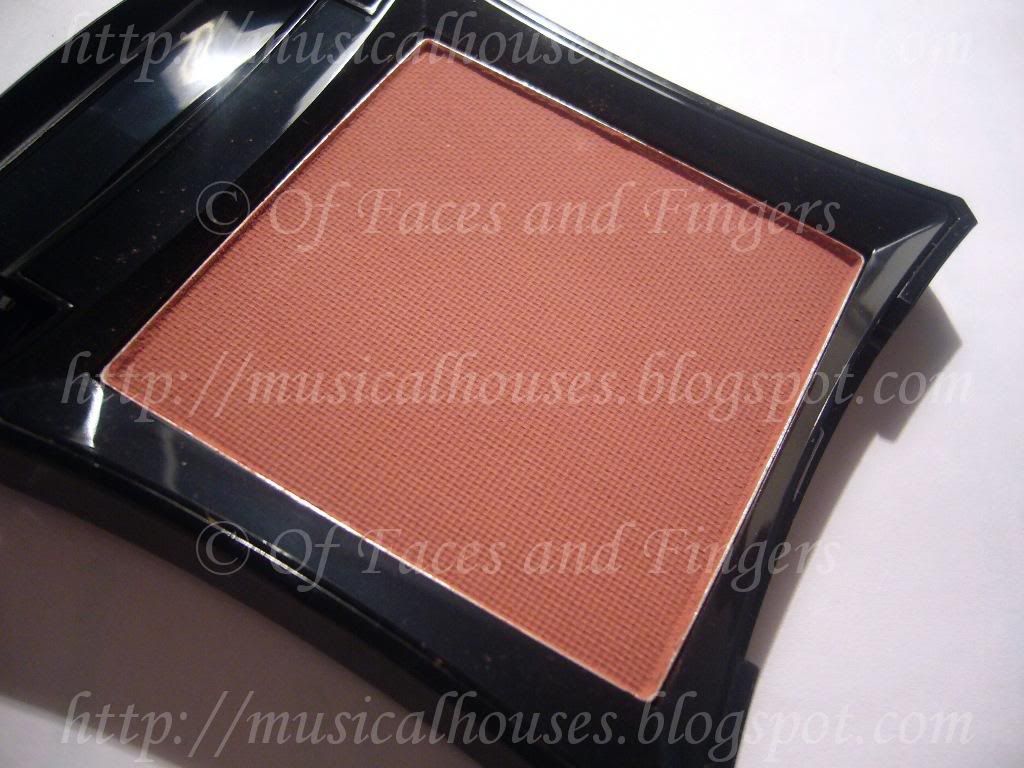
Illamasqua Beg Blush

It looks quite warm in the pan, but it really isn't that bad once on. It's a warm dusty rose, but not so warm that it's unwearable for me. To me, this is on the warm side of neutral. Texture of the blush is good, as is pigmentation - with this one, you really want to use a light hand, especially if you're fair!

While I know that Illamasqua probably didn't create Beg with the fairer ladies in mind, I really like how it looks on, and when properly applied, it looks very pretty and natural. It just goes to show that any bright blush is wearable by even the palest of girls. The key is to apply just a little bit, and blend, blend, blend!

Here's the FOTD. See, it doesn't look so scary on, does it?


And here's what I used:

Eyes:
Stila eyeshadow trio Shimmer Shadows Cool (I don't even know the name of this one, it's really pretty and it's really old. I think it was from 1995! I absolutely LOVE the older Stila eyeshadows.)
Covergirl Lashblast mascara
Urban Decay 24/7 Eyeliner in Rockstar (outer lower lashline)

Face:
MAC Studio Finish Concealer NC20 (undereye area only)
MAC Select Cover Up Concealer NC20 (spot application on face)
Agnes B Radiant Loose Face Powder Lumiere D'aurore mixed with some CS Silica Powder
Illamasqua Beg

Lips:
YSL Gloss Pur in Pure Fuschia

I absolutely LOVE Beg on me. It doesn't look like it would work in the pan, but I love how it gives that very pretty slight flush on my skin. I also really love my YSL Gloss Pur - it looks bright and hot pink in the tube, but when applied it sheers out and becomes a pink lip that's not too bright. I think these are wearable brights - they're bright and add a pop of colour, but they aren't overpowering.

KOTD: Orly Foil Luxe and Wet n Wild Black

Monday, July 26, 2010

16 comments
A few weeks back, my programme had a boat party for the postgraduates, and of course I had to go - it was free for students, and they provided dinner, and you know I'm all up for a free meal :P The dress code was formal, but in rebellion of the utter impracticality of wearing tuxedos and gowns in summer, our class chose to go informal anyway.

Anyway, the whole point of me telling you this is because it actually has something to do with today's NOTD. I started building my outfit around my nails, as I am increasingly wont to do lately, and I decided that I wanted to wear blingy gold nails with some konad. (Note to everyone: only weirdos like me start thinking about their nails before thinking about their clothes.)

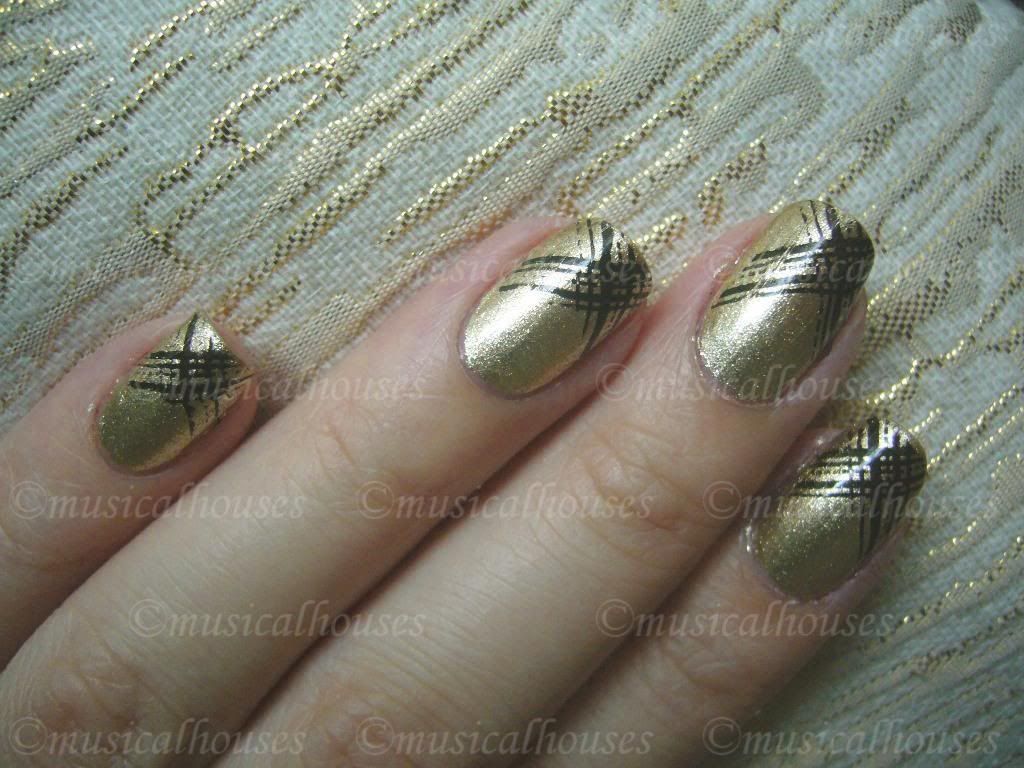
Naturally, I picked out Orly Luxe, from the Foil FX Collection, and I stamped it over with Wet n Wild Black. I used Konad plate M81 for the design. And tada:

Orly Luxe Wet n Wild Black Konad

This is two coats of Orly Luxe, under natural light, konaded over with Wet n Wild Black, which is a really opaque black creme. I just LOVE Orly Luxe. It's probably the best gold foil ever, and definitely the standout of the entire Orly Foil FX Collection. I mean, good gold foils are hard to come by, and this one is smooth, easy to apply, and opaque in one coat (ooh, gold foil konad coming up!). And not to mention I love the colour - it's a shade of gold that isn't too brassy or too warm, and would be perfect on almost anybody.

After I had done my nails, I realized that my nails matched a skirt I had just bought a few days ago (on sale from H&M, yay for 50% off summer sales!). So I ended up wearing the skirt, just because they matched my nails! And yes I know I'm a freak for matching my clothes to my nails, and not the other way around. What can I say - I probably have more nail polishes than I have clothes.

Here's a photo of my nails against the skirt. See, see? They match!

Orly Luxe Foil FX

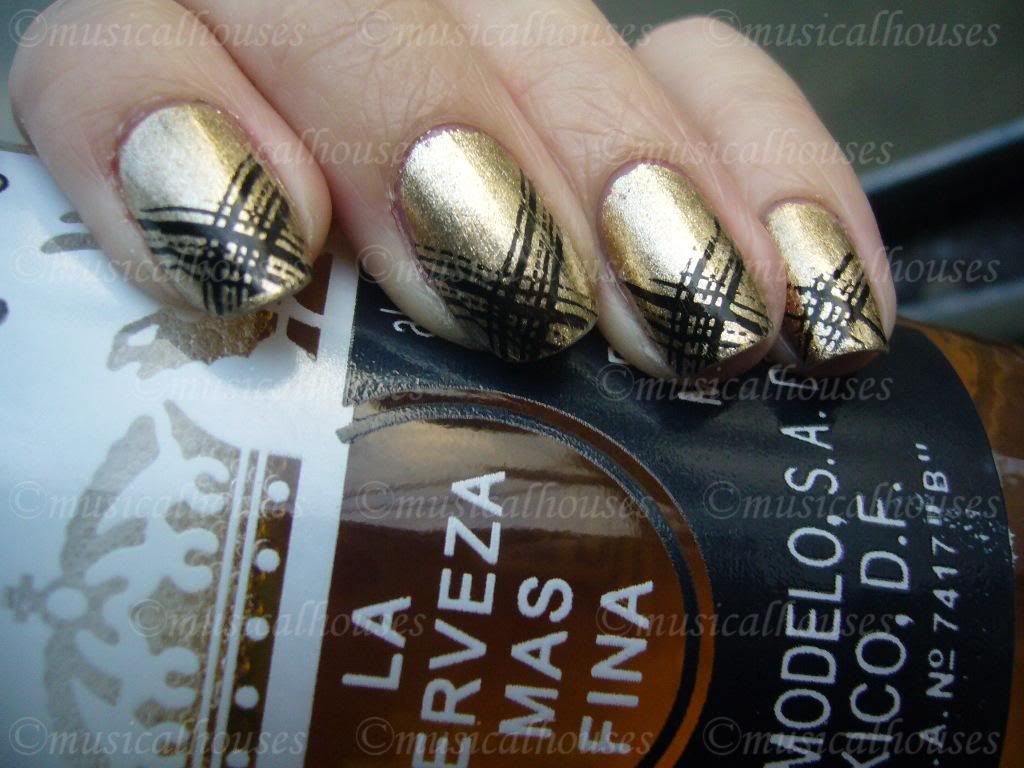
And of course, since it was a boat party for postgrads, I managed to find something else that matched my nails:

Orly Luxe Wet n Wild Black

That was my friend's bottle, LOL. I don't drink very much, primarily because alcohol is full of empty calories, and I've never thought it was worth putting on weight for, with the possible sole exception of pear cider, LOL. I know, I'm a weirdo, but that's a pretty convincing argument to me, LOL.

Anyway, that was my KOTD, and I promise the next post won't feature any alcohol :P

KOTD: Revlon Plum Attraction and China Glaze 2030

Saturday, July 24, 2010

4 comments
Today's KOTD is a little old, but I thought I'd post it up anyway. I love this combination of purple and gold together - something about it makes the combination seem so regal and royal.

This has a base of Revlon's Plum Attraction, which is a beautiful plummy purple, and China Glaze 2030, which is a fabulous gold chrome that's opaque in one coat, and thus perfect for konading. I also used Konad plate M76 for the design, but I had trouble with it. My konading skills just aren't up to par :X

Anyway, here it is:

Revlon Plum Attraction China Glaze 2030

Plum Attraction was nicely opaque, and a very pretty plum colour with pretty subtle shimmer. China Glaze 2030 is a straight up gold chrome, but what I like about it is that the gold isn't too orange warm-toned even for cool-toned girls. It's really quite neutral for a gold, which is great for anyone looking for a gold but who might find most options too warm for them.

Application on both was good. This is two coats of Plum Attraction, which was opaque and went on smoothly. I think it could even be used for konading over lighter colours, because it's nicely pigmented. I didn't have any issues with wear either, this one lasted well on me.

Linkwithin

Related Posts Plugin for WordPress, Blogger...