How To Save Dried Out Nail Polish Strips Tutorial!

Friday, December 30, 2011

29 comments
Over the past year, I've been seeing more and more companies putting out nail polish strips. It started with Incoco, and then before you could say "trend", Sally Hansen, Sephora, OPI for Sephora, Nailene and a bunch of others all started putting them out too.

Unlike most nail appliqués, which tend to be made of a plastic material, I much prefer nail polish strips because the removal process is much kinder to your nails. Most plastic-based appliques involve soaking the entire nail in acetone for proper removal, but because these are essentially semi-dried polish strips, you can just remove them like normal nail polish, with cotton wool and nail polish remover. I've reviewed nail polish strips before in a previous post, and found them to be pretty good for a fuss-free application.

incoco soho chic strip


So, what happens when those nail polish strips - like real nail polish in bottles - dry out? I stumbled upon a solution the other day, when a months-old Incoco nail polish strip set I wanted to use had dried out. Fortunately, the answer is simple. All you need is this:

orly smudge fixer


Yep, that's all. Just a bottle of Orly Smudge Fixer. When I realized my nail polish strips had dried out, I was sad, and thought I'd have to throw the entire set out. And then a thought struck me: since these strips were made of nail polish, couldn't I rehydrate them with thinner, just like real nail polish? And isn't my handy bottle of Orly Smudge Fixer mostly made out of thinner anyway?

So began the experiment. The strip I'm using here is Incoco Soho Chic, a gorgeous deep brown with flecks of gold/red shimmer. It's absolutely gorgeous, which is why I was so loathe to just let it die like that.

First, I placed a strip on my nail (if you've never done this before, here's a nail polish strip tutorial to help you out). As you can see, because the nail polish strip is dried out, it doesn't stick nicely to the nail. It's all bunched up and uneven at the sides. Normally I don't have this problem with the nail polish strips - they usually just stick quite flat to the nail.

saving dried nail polish strips 1


Next, we add a little of our secret sauce - Orly Smudge Fixer. I just painted the smudge Fixer over the unsticky parts of the strip, and the bulges. You can also just paint over the entire nail with Smudge Fixer if the strip is really dried out, but the general idea is to wet the strip enough for it to adhere properly to the nail.

saving dried nail polish strips 2


And you're done! Look, no more weird bulges! Wasn't that simple? Just wait for the strips to dry, and you're good to go! Well, there is a small catch, though. Because the strips have been wet with Smudge Fixer, they will take a little while to dry. If you are impatient, a layer of quick-dry topcoat would help to speed things up.


And there you have it! Good as new! Other than Orly Smudge Fixer, I think you could use any other brand of nail polish solvent or thinner. The general idea is just to put back the solvent which had evaporated and thus caused the strip to dry out. I'm pretty excited about this method, it's simple and it works! Now I have an awesome manicure, and saved myself bunch of money!

Mixing Nail Polish and Pigments: Sprinkly Glitter NOTD

Wednesday, December 28, 2011

4 comments
After doing my green/gold Christmas eye look, I was left staring at my Evil Shades loose eyeshadows, and a thought came to me - wouldn't it be awesome if I could have a nail polish with a finish like that? And so began this experimental NOTD.


For this NOTD, I used Nails Inc Fitzhardinge Street as a deep green creme base, and basically loaded my Evil Shades eyeshadows in Ice Star and Morning Star over it. I picked these two shades because they have more chunky glitter than the rest of my eyeshadows, which made them perfect for adding some glitter to my nails!

nails inc fitzhardinge street and eyeshadow glitter 1


I know people do franken their own shades, but I didn't feel up to an all out franken, since the last time I tried to mix my own colour, it was a big fail. Instead, I waited til the nail polish was semi-dry, and then sprinkled the eyeshadow powders on top. Surprisingly, this was actually easy to do. The glitter stuck to the polish, and I realized how easy it is to create a gradient look with this method. Just imagine all the possibilities - gradient manis, glitter tips, and galaxy nails!

nails inc fitzhardinge street eyeshadow glitter 2


I'm honestly quite excited to try this again. The only downside is that after I was done, my fingers were all smothered in eyeshadow powder, which was a total pain to remove. Although I washed my hands numerous times, there was always some glitter stuck somewhere, LOL.

nails inc fitzhardinge street eyeshadow glitter 3


Glitter adventures aside, I love this look and I think it's a great way to experiment without going all the way to frankening new shades. And it's also an awesome way to find new life out of loose eyeshadows that you don't often use and would otherwise sit untouched.

Elianto Haul + Penang Trip: Fun in Malaysia!

Monday, December 26, 2011

3 comments
As some of you may know, I travelled up to Malacca and Penang in end-October and early-November respectively with some of my colleagues. Both times were fun, and good opportunities to recharge from the daily grind of work. And of course, since I was in Malaysia, I couldn't help indulge in hauling a little bit!

penang street view

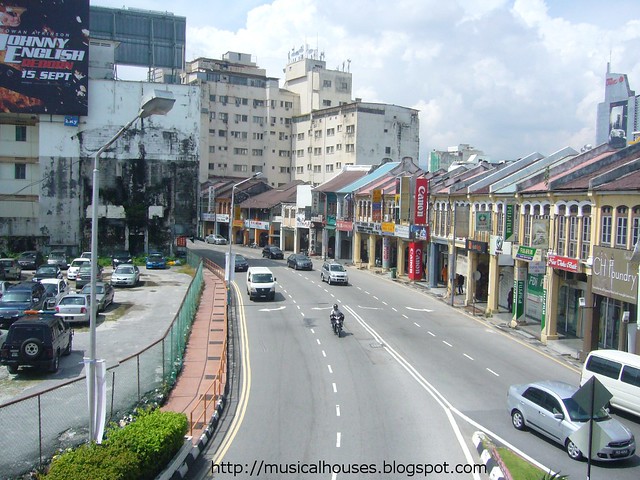
(Street view of Penang)


I hauled Elianto, a local Malaysian brand that's cheaper in Malaysia than in Singapore. If you read the marketing schtick of Elianto, the brand claims it's a Korean-Malaysian brand, but I think that's really just marketing spiel, because in general Korean and Japanese brands tend to sell better than other local Asian brands (e.g. Taiwanese, Hong Kong, etc). Thus, some local brands try to portray themselves as being Japanese or Korean-like, in an attempt to latch onto the cachet of such brands. In fact, if you go to Korea, I doubt you'll find Elianto - the last time I went there (although it was a couple of years ago, to be sure), the brand wasn't even available there.

But regardless of their marketing (are they Korean? Malaysian? Malaysian but made in Korea? Vice versa? If you google it, you'll see everyone's confused, and some consumers are feeling scammed over the "you're not really Korean" thing), Elianto does have some very nice products, and they are very cheap too. So, I bought a few items. I just couldn't help it!


Altogether, I bought two eyeshadows and two nail polishes. I actually bought a nail polish in Malacca, first, and then the rest were bought shortly later when I was in Penang. I would have bought a LOT more, but both times I was with my colleagues, and I didn't want them to think I was crazy...*looks around suspiciously*

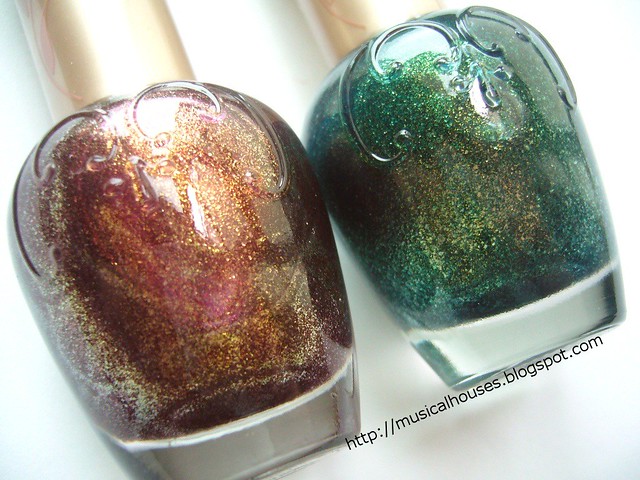
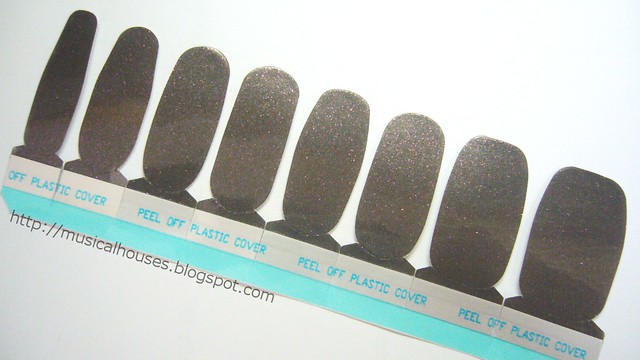
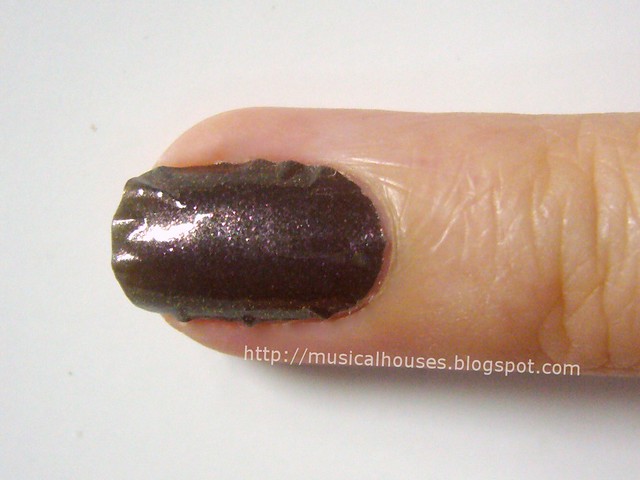
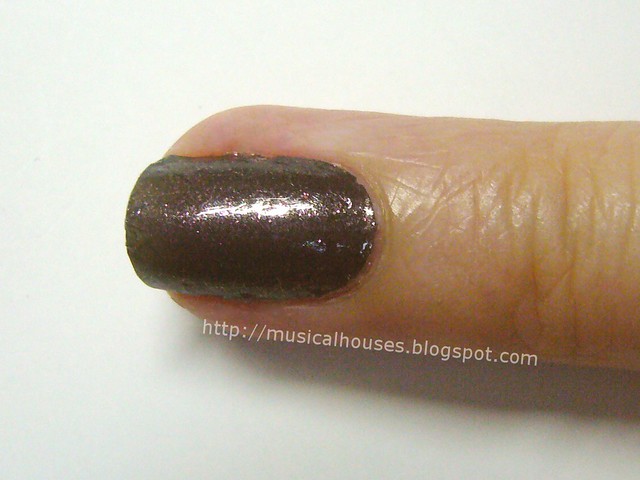
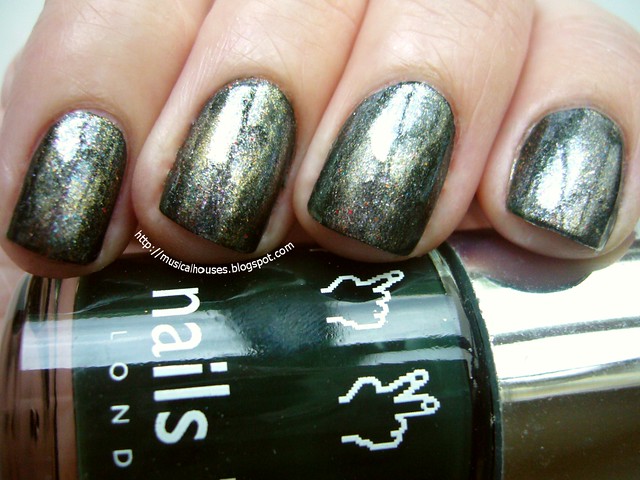
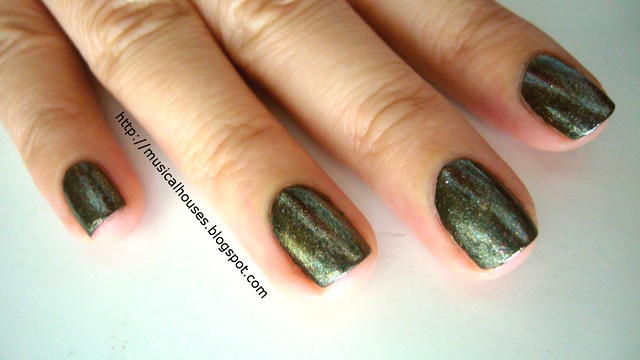
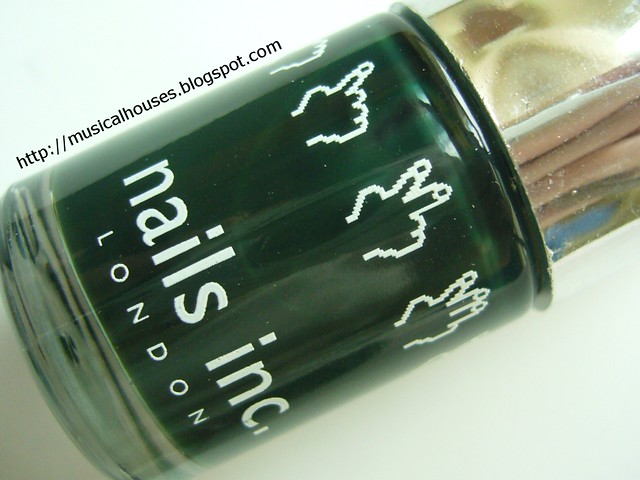
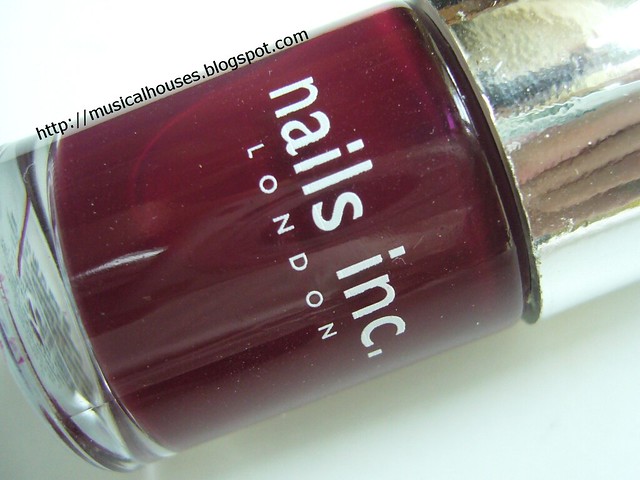
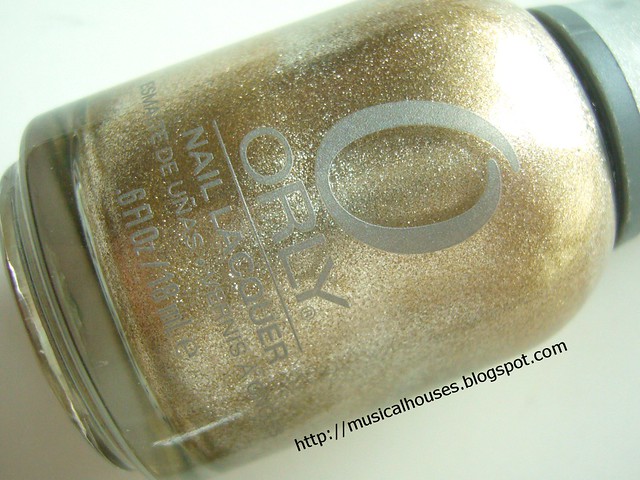
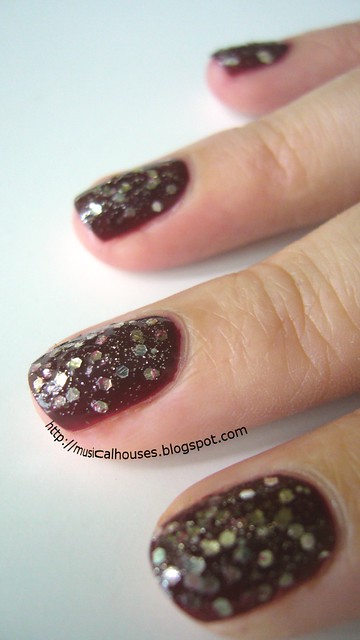
Anyway, let's take a look at the haul up close. The nail polishes were good...I bought one first, went home and tested it out, and realized that it had a really great brush and great texture. Not too thin or thick, and opaque in two coats. Awesome. So I bought another one. I bought Burnt Umber, a gorgeous brown-red with green glitter, and I hope it has a green flash too, but we'll have to wait til I try it out. It reminds me of MAC's Club eyeshadow, but in nail polish form. I also got Racing Green, a forest green with light green glitter. Also a standout of the line, if you ask me.

elianto nail polish haul


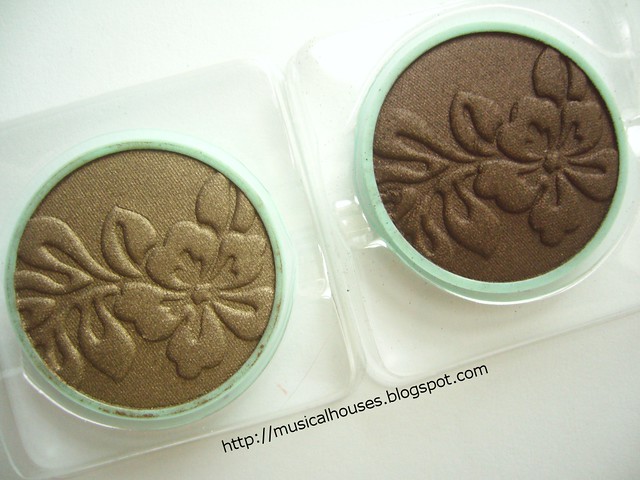
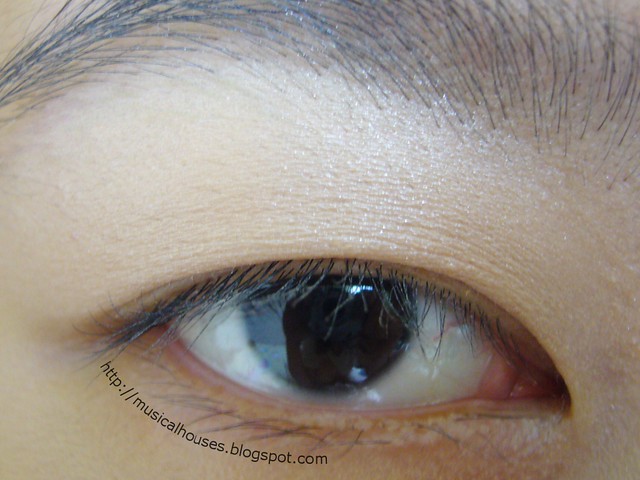
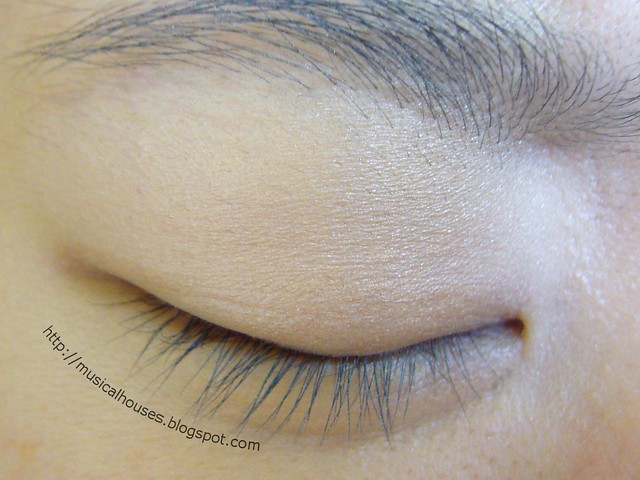
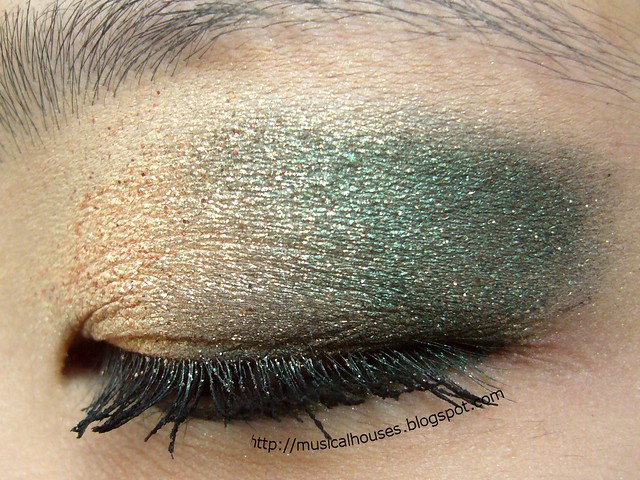
Next, for eyeshadows! As with all brands, some of the Elianto eyeshadows were hits, and some were misses. However, both of these were fantastic - great pigment payoff, great texture, and great finish. They're also generously-sized, with pans that are bigger than MAC but smaller than Stila.

I bought Taupe, which is NOT TAUPE but a nice medium-deep olive green-brown shade...very nice and neutral, and universally flattering too! I also bought Toffee Brown, which is a deep brown with neutral undertones. I hadn't realized that these didn't come with their own containers. Apparently you're supposed to buy a palette and stick these in the palette. I guess I'll just my Stila palettes instead. Oops.

elianto eyeshadow haul


Anyway, now that you've seen pretty makeup pictures, what about travel pictures? I'll even throw in useless commentary :)

First, a chendol stall! Penang is famous for its food, among other things, and we spent a lot of our time hunting down some of the more famous foods there. One of them was the chendol (feel free to google any unfamiliar food names if you're not from this part of Asia). There are quite a few roadside stalls in Penang selling chendol, and I don't think we ever figured out which one was supposed to be good..we just kind of ate randomly from a couple of stalls. Here's a typical roadside stall, with a customer (my colleague) eating in front of the stall. Now that's what you call alfresco dining!

penang chendol stall


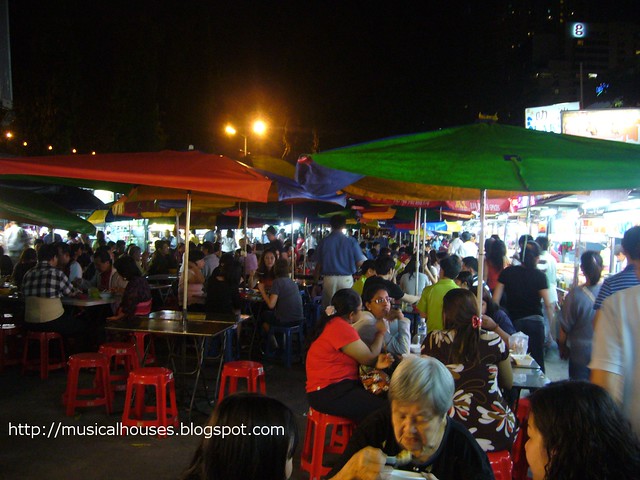
Then, outdoor food markets! I honestly can't remember where this is, but apparently it's one of the more famous and thus touristy ones. This one came recommended by some friends, which is why we went to it, but the food wasn't that great. It sure was crowded though.

penang hawker stall


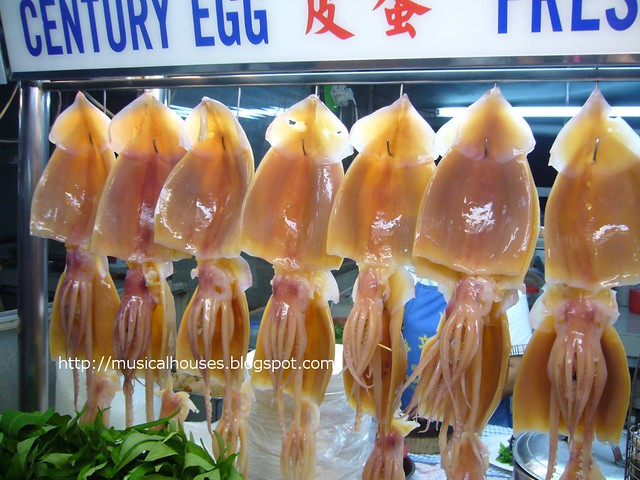
A close-up of some raw food hanging from a stall in the food market. It looks gross, but all that's gonna be turned into delicious food! Yummy!

penang food stall


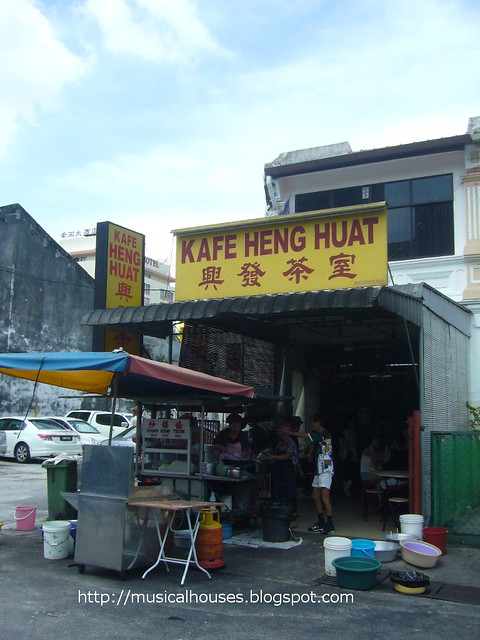
Yet another roadside food stall. This one is higher-class though, you actually get to sit in the shade to eat your food. The carrot cake (once again, google if you're not from this area of the world - it's not quite a "cake" in the Western sense of hte word) from this stall is apparently quite famous, and it was pretty good. It's also not cheap by Penang standards - about RM7 for a smaller-than-usual plate of carrot cake. But I really liked it, and thought it was worth the cost and the trouble to walk there under the hot sun.

penang carrot cake stall


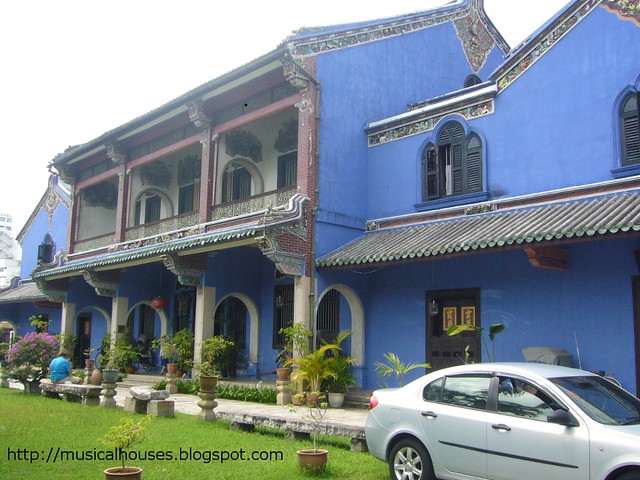
And some sightseeing, and possibly a very interesting spot to visit if you're into architecture - the Cheong Fatt Tze Mansion. This was built by a trader named Cheong Fatt Tze, who lived in the late 1800s to early 1900s. He was quite rich, so the house was very ornately built, and very big too. In fact, the servants lived across the road in specially built apartments for them, so this house was just all family members. Unfortunately, fate can be cruel, and the family's fortunes went downhill after the Second World War, and the mansion was eventually sold off, and now is owned by a group of local Penang people who wished to preserve it.

penang cheong tze fatt mansion

Anyway, this was a long post, thanks to the photos, so I hope you enjoyed it! I only put up photos from Penang, because I was too lazy to go through my Malacca ones to upload, and I didn't want the post to be too long. Anyway, my only regret was that I didn't buy more Elianto items, but the next time I'm in Malaysia, I'll definitely be keeping an eye out for those!

Flirty False Lashes: Before and After!

Saturday, December 24, 2011

5 comments
Nothing makes a pretty eye like a gorgeous set of lashes. And if you don't have it, why not fake it? While I'm not a big fan of false lashes in general (I don't like the feeling of something being stuck to my eye), I do appreciate the effect that it gives. And, holiday season is the perfect time to go all OTT with length, volume, and bling on lashes - I don't know about you, but I always feel like consumers tend to buy more false lashes whenever there are holidays.


The false lashes I tried out were from KKCenterHK, a Hong Kong-based online retailer of various types of makeup and beauty items. I've previously reviewed another of their lashes which were more natural-looking. This pair I have now is ES A63, which really gives you that va-va-voom effect!

kkcenterhk false lashes 2


Although the lashes are advertised as short and natural, they aren't actually very short or natural looking, in my opinion. These are some serious lashes! They come with a clear lash band, so you don't get that thick black lashbone being visible, but the individual lashes themselves are long and thick. This isn't a bad thing though - if you want lashes that have a bit more drama, these are perfect, without being to OTT.

Don't believe me? Here are some before and after photos. I used my sister's eye for this shot, and it wasn't easy persuading her to stay perfectly still, hold her eye open, and look straight at the camera, so I hope someone appreciates the effort it took me to bribe my sister to do this!

Here's a before shot of my sister's eye. I cheated and used the shots from my previous false lashes review, because i didn't want to go through the trouble of taking another set of bare eye photos (see paragraph above).

eye before lashes open


And here's the before shot of my sister's eye, closed this time. (Once again, photo was nicked from the previous review, for the same reason).

eye before lashes closed


Now, ready for some magic? Let me wave my wand and bibbidi-bobbidi-boo, awesome lashes have you! Man, don't you love those classic Disney movies?

eye after lashes open


And here's a closed eye shot of the lashes. In this shot, you can see how long and thick they are in comparison to my sister's natural lashes.

eye after lashes closed


Although these don't look that natural to me, they're perfect for that special night out. In terms of wear, they're relatively comfortable for a pair of falsies, and the lashbone is relatively flexible and pliable. So there you have it - a gorgeous set of lashes at a reasonable price, that really transform the look of the eye.

(Product was sent for review. Review is my complete and honest opinion. I am not affiliated with/compensated by the company.)

My Favourite Christmas Nail Polishes!

Thursday, December 22, 2011

4 comments
Since Christmas is just round the corner, I thought I'd share a little more on what are the shades I keep reaching for every festive season. Of course, these are all going to be Christmassy colours!

Here's a shot of all of them together. Green, check. Red, check. Gold, check. Glitter bling, check. Yet more glitter bling, check.


Let's start with one of my perennial favourites, Nails Inc Fitzhardinge Street. I know you're probably sick of seeing this shade now because I previously already did a Nails Inc Fitzhardinge Street NOTD, but I love this shade. It's the perfect deep Christmas green, and a one-coater to boot!

nails inc fitzhardinge street bottle


The next favourite is Nails Inc Paddington Street, which has also been overexposed with a previous NOTD, and yet another previous NOTD. But I love this shade. Deep, smooth berry red, perfect not just for Christmas but also all year round - it's just such a classic shade.

nails inc paddington street bottle


Annnd, gold! Orly Luxe (yet another polish I featured before sometime back, and again more recently) is definitely hands-down my favourite gold polish ever. I have a few golds, and none comes close. For me, this is it. Perfect neutral gold that looks good on any skintone, vibrant foil finish, and opaque in one coat. And, it also works well as a konading polish too, so it's really all that and a bag of chips. I've liked it so much I've used it not once, but twice!

orly luxe foil fx bottle


Now onto glitter. Let's ease you in with the milder stuff first. Nubar Candy Apple may look kinda puke-green in the bottle, but when on, it really looks more like small gold glitter in a clear base. This makes it perfect for layering on top of a creme polish for that extra sparkle. It's wearable on its own too, but the more you layer it, the closer it looks to bottle colour, and thus the less Christmassy it becomes. It's still a nice colour, but just not Christmassy.

nubar candy apple bottle


Now, the real bling. Before Essie Set in Stones was ever conceived, Maybelline Silver Spells was out there being a big, bad girl. Maybelline Silver Spells may look similar to Essie Set in Stones, but it really predates it by awhile. With two sizes of glitter, and a clear base, this is perfect for layering. I've used it in a recent NOTD, and the glitter is really dense.

maybelline silver spells bottle


So there you have it - my favourite shades for the holidays! What are yours? Anything I missed out? Tell me!

Neutral Berry FOTD: Sleek Fenberry Blush and Maybelline Color Sensational Lipstick

Tuesday, December 20, 2011

7 comments
Last week, I went out with my friends from University for lunch. It was a simple lunch, so I just did a simple FOTD (Face of the Day), using some of my latest products. In particular, I wanted to use some of the new products I've been using lately, in particular the super awesome Sleek Makeup Fenberry Blush from the Berry Collection, as well as the new Maybelline Color Sensational Lipsticks.

Altogether, I think it was a good look, although it was neutral and boring. This is also the kind of makeup I wear every Monday to Friday to my office. So yes, despite my awesome colourful eyeshadow stash, on an average day I wear barely any eyeshadow. Sad life, I know.


Here's the breakdown for the look.

FACE:
Kevyn Aucoin Sensual Skin Enhancer (on undereye area)
Prescriptives Anywear Makeup Stick (on blemishes on face)
Transparent Loose Powder - I use a 50-50 mix of Pond's Magic Powder in Sweetie Pink and pure silica powder, I got mine from Coastal Scents
Sleek Makeup Fenberry Blush

EYE:
NARS Abyssinia (all over lid)
Apple Super Lash Mascara
Urban Decay 24/7 Eyeliner in Rockstar

LIPS:
Maybelline Yummy Plummy Color Sensational Lipstick
Hello Kitty Rosette Treatment Lip

I liked the combination of the Sleek Fenberry blush and the Maybelline Yummy Plummy lipstick. The colours look a little more intense than in the photo - I swear in real life it looks a little more rosy, especially on the cheeks. And yes, I know my undereye bags are epic. This is AFTER they've been covered up partially. It's much worse when I wake up in the morning.

Also, another of my makeup application quirks is that I don't usually use foundation, because it usually doesn't do any favours for my blemish-prone skin. But I do use concealer to cover up spots I have, and set with transluscent powder, which is whatever loose powder (I'm not picky, I go for cheap stuff that wouldn't break me out), and silica powder, for better oil control. This mixture works like a charm, since silica powder alone can be too drying and leave a white cast if you're not careful, and just loose powder alone wears off after awhile. I totally recommend this for anyone with moderate oily skin who doesn't need a lot of coverage.

And the Winner Is...

Sunday, December 18, 2011

2 comments

Thank you to everyone who took part in the Dr Organic giveaway! We've drawn a winner, and the winner is...


a Rafflecopter giveaway


Thank you once again to everyone for taking part, and to Holland and Barrett for sponsoring this giveaway!

Sleek Mossberry Kohl Pencil as a Lip Pencil: Yes It Works!

Friday, December 16, 2011

9 comments
Remember the last time I blogged about the Sleek Makeup Berry Collection? And remember how I said I didn't really like the Mossberry Kohl Pencil as an eye liner (it made my eyes look a little bit gross), and said it would work better as a lip pencil instead?

Well, here's proof. I finally tried it out as a lip pencil, and I have to say - this is so much better as a lip pencil than as an eyeliner. I know it may or may not be lip safe, but I really like it as a lip pencil. The texture isn't too bad. It drags on the lips somewhat, as you might expect, but once it's on, it stays on unless you eat or drink. And the colour is also pretty darn gorgeous - it's a deep purple-leaning berry that's really beautiful on.

Here's a swatch of it for you. Not too bad, right?


Would you wear the Mossberry Lip Pencil as a lip liner? I totally would!

(Product was sent for review. Review is my complete and honest opinion. I am not affiliated with/compensated by the company.)

Simple Gold Glitter Gradient Christmas Nails

Wednesday, December 14, 2011

11 comments
Since my nail beds were actually looking nice and pink and unstained for once, (I wish I could say that my nails were just that fabulous, but the reality is that I don't wear much nail polish at work anymore. Sigh.) I thought, why not do a mani to show them off? So I decided to do a gradient mani with - you guessed it - some bling!


I used Etude House Lucidarling Fantastic Nails in 04 Sequin Crystal Gold for the glitter gradient, but to add a little more pizzaz I also added a little bit of Maybelline Silver Spells for the big round glitter bits. For the base, I used Rimmel French Rose, which is a sheer light milky pink meant for French manicures.

I've blogged about the Etude House polish before, and back then I said it was pretty awesome, and one year on, I still think it is! It's a mix of small gold glitter and larger round holo glitter in a clear base, and so pretty. Silver Spells is such an awesome polish, consisting of very dense, big chunky pieces of hexagonal glitter in a clear base as well as tiny silver glitter - perfect for layering.

christmas gold gradient glitter nails 2


I didn't have much issue with Etude House Sequin Crystal Gold, and it more or less applies quite normally, although some dabbing was needed to even out the glitter. Maybelline Silver Spells definitely needed dabbing to prevent the glitter from clustering together. So basically this mani was quite idiot-proof - it was really more dabbing than painting! The painting bit came in right at the end, where I painted my nails with Rimmel French Rose.

christmas gold gradient glitter nails 3


I'm not sure if these nails really count as Christmas nails (I mean, there isn't any red or green!) but I do feel that the gold glitter really gives the mani a festive vibe. I like this mani - it's simple, wearable, and easy to do. Perhaps ideal if I want an understated holiday mani, I guess!

Kesha-Inspired Silver Lips: My First Kiss Went a Little Like This!

Monday, December 12, 2011

6 comments
The other day, something crazy struck me. I was wasting time on Youtube, watching 3OH!3's "My First Kiss" video, featuring Kesha. While I was mentally chanting, "My first kiss went a little like this! And twist!" I couldn't help but notice Kesha's gold lips in the video.

(Image source)


All of a sudden, a thought came to me - what if I did something like that, just for fun? And what if it was silver, instead of gold? I didn't have any silver lipstick, so I looked or something else that I could use. I remembered seeing other bloggers use things like eyeliners and eye pencils for such a look, so I thought, why not use some crem eyeshadows? And that's when it struck me - the Sleek Molten Metal in Steel and Ash would do just nicely!

I've blogged about the Sleek Steel and Ash Molten Metal before, but back then I was using them as cream eyeshadows, not lip colour. So here you go! The result of my crazy boredom. Pardon the messy application, I hope you get the idea!


For hygiene purposes, I didn't use these on my lips straight out of the packaging, as I didn't want to contaminate my cream eyeshadows. Instead, I scooped a bit out onto the back of my hand, and worked with a brush from there. Obviously my skills need brushing up. The Molten Metal actually felt alright on my lips - not too drying or oily feeling (I accidentally got some on my tongue, and it didn't taste too good, LOL).

Obviously, I didn't dare to wear this look out, and I didn't have it on long either because it started smudging after awhile. Since the Molten Metals were made as eyeshadows, I'm not sure how lip safe these are, but they're sure fun to play around with. Would you wear crazy colours on your lips? Or is that just too out there?

(Product was sent for review. Review is my complete and honest opinion. Obviously, I'm not using it as was intended, and I am not affiliated with/compensated by the company.)

Gold and Green Christmas Eye Look: Bling on the Holidays!

Saturday, December 10, 2011

7 comments
Since it's Christmas season, I figure should use the opportunity to try out colours on my eyes that I normally wouldn't wear - in this case, the Christmassy colours of gold and green! And of course, since it's the holiday season, I also made it glittery and blingy, just for good measure. I mean, why not?


For this look, I used two Evil Shades eyeshadows, Morning Star and Dryad. Evil Shades is an indie brand run by Andrea, who, by the way also runs the blog Black Nail Polish and Lip Gloss. I know the blog name makes her sound like a total punk, but she's also one of the nicest people I've come across in the blogosphere. I've actually swatched Morning Star before and done an EOTD with Morning Star, and I've also reviewed Dryad before. But I've never used the two together yet, and since they fit nicely into the green-and-gold look I was going for, why not? You can visit those links for more on the individual shadows, but here's a shot of both of them together.

gold green christmas eye look evil shades morning star dryad


For this look, I used Morning Star on the inner half of my lid, and Dryad in the outer half and in the contour area, and then just blended the two. The look was simple enough, the hard part was really blending the two together, without having the chunky glitter from Morning Star fall all over. Okay, if I had used a primer, it would have helped. But I didn't. I was lazy. I just patted them over a concealer base, and then complained about how blending was difficult. LOL. (If you haven't realized by now, I'm really kinda lazy when it comes to eye primers. I think it's because in real life I don't wear that much eye makeup in real life, working in an office environment and all.)

gold green christmas eye look 1


Morning Star has big chunky bits of glitter that really add that level of glitz to the eye look. I typically hate chunky glitter, but Morning Star is interesting - the glitter in the eyeshadow really catches the light and sparkles in a very stunning way. Almost like a star! Dryad doesn't have big glitter, so there's less fallout, but it doesn't mean the shade is any less interesting. Dryad has a metallic sheen to it, and is a gorgeous shade of forest green with a lovely finish. I quite like the way the entire eye looks - the combination of two different finishes and glitter types really addes some textural interest.

gold green christmas eye look 2


Anyway, Dryad is still available on the Evil Shades website, if anyone's interested, although Morning Star isn't available anymore. I'm not sure how I would pair this look. I'd go for a nude blush, but I can't quite decide whether I should pair it with Christmas-classic red lips, or whether I should go nude for the lips as well. Anyone wants to help me decide on which is better?

(Products were sent for review - in this case, really means "given to me because Andrea is an awesome friend". Review is my complete and honest opinion. I am not affiliated with/compensated by the company.)

Hello Kitty Lipbalms Haul: Never too Old for Cute!

Thursday, December 8, 2011

8 comments
As some of you may know, I travelled to Japan recently for work. Unfortunately, since it was for work, there wasn't much time or desire to haul (so unlike the last time I went to Japan, I don't have any funny photos to show you), but when I was at the airport, I had some extra Yen coins to get rid of, so on impulse I bought these two adorable Hello Kitty Lipbalms!


The first one is a Hello Kitty Rosette Treatment Lip, which is basically just a plain uncoloured lipbalm/lipgloss. Awww, you just gotta love the packaging! The apple drawiwng on the packaging is meant to indicate the smell (it's touted as having a sweet apple scent).

hello kitty rosette treatment lip


The Hello Kitty Rosette Treatment Lip is just like plain ol' lipgloss to me. It doesn't treat lips as much as it claims to do, but it's decent - perhaps not too much different from Vaseline, only that it feels a lot less sticky on. But obviously when I bought this, I wasn't thinking of how effective it was. I just wanted the Kitty!

hello kitty rosette treatment lip tube


The Hello Kitty Rosette lipbalm does have a very strong sweet apple smell, although the smell dissipates very very fast upon application. I find that a pity - although I know the scent is artificial, I really like it, because it reminds me of those Yupi Burger candies I used to eat. Anyone ever tried those?

(Image source)


If Yupi Burger isn't your thing, the other thing I thought it also smelled a lot like was those Haribou sweets. Yup, here's another excuse for me to shamelessly put up another photo of childhood candy!

(Image source)


The other thing I bought was a Shiseido Water in Lip Lipbalm, which is basically a drugstore range of lipbalms Shiseido put out. Nothing special, except that this one has Limited Edition Hello Kitty Packaging! (Yes that's what it says on the packaging, anyway). So I just had to get it. The lipbalms come in a few flavours. The one I have is raspberry. I haven't tried it yet, so I can't comment on what it is like, unfortunately.

shiseido water in lip hello kitty raspberry


I gotta admit it - I really bought these just because they were so cute! (Don't look at me like that - I'm pretty sure I'm not alone!) Fortunately, lipbalm is one of those things that you can never have enough of, so I'm pretty glad I bought these.

Essie Set in Stones Dupe? Maybelline Silver Spells

Tuesday, December 6, 2011

6 comments
Essie's Luxeffects Collection consists of four glittery polishes that are meant for topcoating and layering over a manicure. Since I absolutely love glitter on my nails, I was totally ogling this collection! I mean, just imagine all the layering possibilities! I was drooling over swatches, when the swatches of Set in Stone caught my eye. I thought, "Hey! That looks familiar! I think I may have a dupe!"

So I dug out my suspected Set in Stones dupe - Maybelline Silver Spells, a really old, discontinued polish. Maybelline's Silver Spells may be old, but it is still pretty awesome. Like Essie Set in Stones, it consists of variously-sized silver glitter in a clear base. The glitter comes in two shapes - a small square glitter, and large hexagonal glitter. And like Essie's Set in Stones, Silver Spells is very densely packed with glitter.

maybelline silver spells bottle


I felt inspired to use Silver Spells for a mani, so here it is! I used Silver Spells over another polish I love, Nails Inc Paddington Street, a deep burgundy creme base. If it looks a little familiar, it's because I've used Nails Inc Paddington Street in a previous mani before. A simple coat of Silver Spells, and my mani is totally jazzed up!


I'm not sure if Maybelline Silver Spells is a total dupe for Essie Set in Stones, but I do think they may be quite similar. Because the glitter in Maybelline Silver Spells is so densely packed, some dabbing is required to even out the glitter a little bit more, otherwise it tends to pool and clump up on your nails. But it's so worth the effort, though!

maybelline silver spells nails inc paddington street


I'm really loving this mani - it's so glittery and blingy and festive. Although it's not quite a Christmas mani, I think it kind of suits the season, with the deep red base and the truckloads of glitter. I can't help it, but I always associate glitter with the holidays!

maybelline silver spells nails inc paddington street 2


I'm not certain if Essie's Set in Stones is really a 100% dupe to Maybelline Silver Spells, but having Silver Spells has really killed my lemming for Set in Stones. That's one polish I can remove from my infinite list of polish lemmings! Now, to find drugstore dupes for the other 23856283 polishes on my list...

Linkwithin

Related Posts Plugin for WordPress, Blogger...