
These were pretty easy to do, too. The tutorial below shows you just how easy it is.
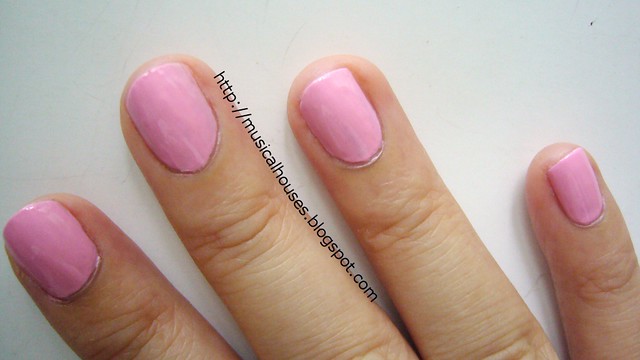
1. First, paint your base colour. (I'm assuming you already have base coat on, of course.) Here I used OPI Pink Friday from the Nicki Minaj Collection.
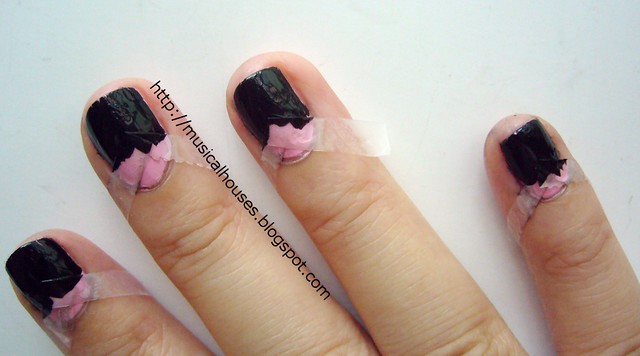
2. After the base layer is dry, stick tape on top of the base layer in your desired Chevron shape.

3. Then, paint the top shade from the taped area to the ends of the nails. Here I used Wet n' Wild Black.
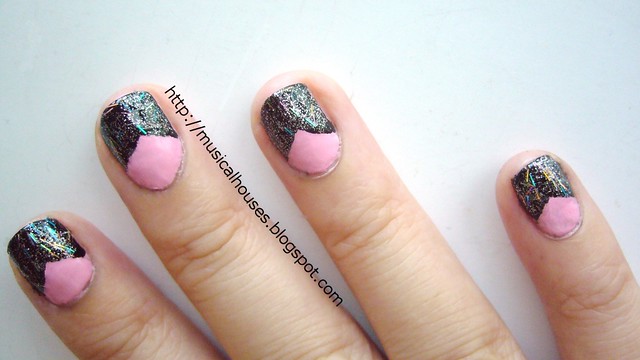
4. If you want to jazz up your Chevron, add a little glitter! This is OPI Save Me from the Nicki Minaj Collection.

5. Wait for the polish to dry, then peel off the tape, and viola! Chevron nails, with glitter on top!
Lastly, here are a few final tips I hope you'll find useful. Firstly, before you lay the tape over your base layer, make sure the base layer is really, truly dry. If not, the tape will peel the base layer off your nail. Also, for a sharper Chevron edge, wait til the polish is dry (or mostly dry) before peeling off the tape. If the polish is too wet, it will smudge when the tape is being peeled off.
I like this combination very much, I like the contrast of pink and black, and I also feel like the holo and silver glitter in Save Me really stands out against the black. I actually got these polishes in my Feburary Vanity Trove, so if you're interested you can check out Vanity Trove.


.JPG)


You made it so simple to achieve ... Loved it :)
ReplyDelete<3
Shalini
How cool is that, looks funky!:-)
ReplyDeleteWow! Those nails are really cute. Thanks for the great idea!:)
ReplyDeleteWow! Those are really cute nails. Thanks for the fun idea!
ReplyDelete