

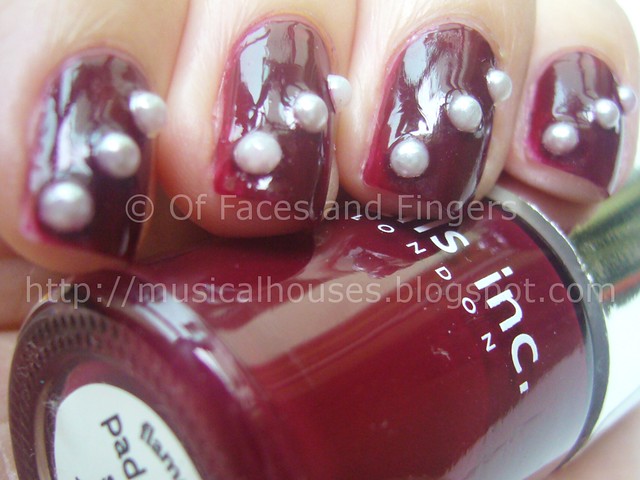
The nail polish in question is Nails Inc Paddington, a gorgeous glossy deep red I bought in my craze to own as many Nails Inc colours as I possibly could before leaving the UK. It's distinct from Nails Inc's other famous colour, Victoria, in that Victoria is a jelly (sort of), while Paddington is a creme, and Victoria has a tinge more purple to it, whereas Paddington is more maroon.
Anyway, I first applied Paddington, which applies like a dream, as with most of my Nails Inc polishes. I loved how absolutely classic it looked. So I decided that if I wanted to bling it up, I would have to use something equally classy - and lo and behold, I took out this little baby.
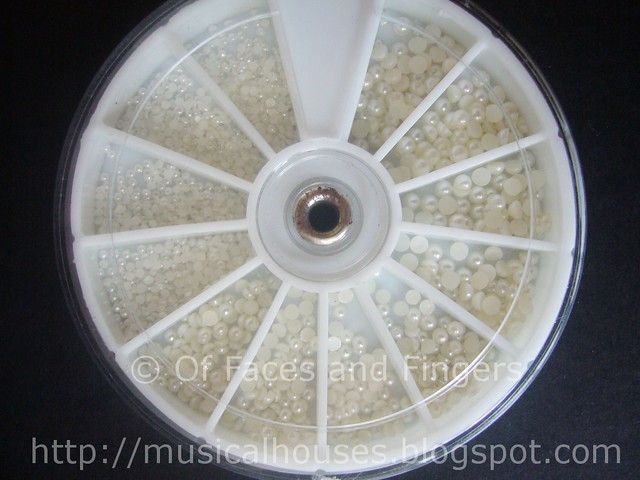
This humble-looking set of nail art pearls is available from Born Pretty Store, which has been quite popular among nail bloggers lately for their vast array of nail art products. The store simply has everything, from shatter polish to nail art tools, and of course, nail art decorations like this set of pearls. This set of pearls is the 3 sizes nail baby pearl rhinestone decoration wheel, available for a very reasonable price.
The pearls come in three sizes, so you can pick and choose to form various designs, or to suit very large or small fingers. I've taken the liberty of photographing a pearl of each size against a ruler, so you can guesstimate how large these are. The smallest pearl is really quite tiny, while the largest pearl is pretty big.

For this look, I used just the medium-sized pearl. For round items like nail art pearls or rhinestones, I find it best to pick and place them on the nail by using a damp toothpick, a tip I learned from some other nail bloggers. Basically, you dampen the end of a toothpick, and touch the surface of a pearl or rhinestone. The pearl or rhinestone will then "stick" to the toothpick due to the surface tension of the water, thus allowing you to move the pearl and hover it over the nail until you are fully satisfied with its position. Then, you can lower the pearl or rhinestone on to the surface of the nail, and the wet nail polish will have a stronger surface tension than the water on the toothpick, so the rhinestone will stick to the nail even after you lift your toothpick. Nifty, right? Sometimes I also use a pair of tweezers, when I can't find a toothpick lying around.
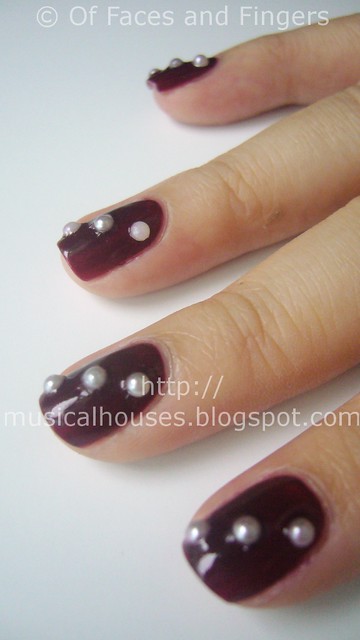
Another tip I've found handy when working with nail art is that topcoat is needed over the pearls and rhinestones, otherwise they will fall off within a couple of days. I typically use two coat of topcoat over the nail art. I first use a slow-drying topcoat, and then apply a second coat of fast-drying topcoat, like Seche Vite, over it. That way, the pearls and rhinestones stay firmly in place for as long as possible, without me having to wait for hours for my manicure to dry. With this method of slow topcoat and fast-dry topcoat, my manicure is typically ready to go after half an hour. Meanwhile, in the interim half-hour, I can use my hands, but carefully.
Lasting power of the manicure was very good. If you've been a longtime reader of my blog, you'll know I'm an absolute hoor for all Nails Inc polishes, since they work very well on me. Nails Inc's Paddington applied smoothly, and stayed on for 3-4 days before chipping, which is about usual for me. I only wish that Nails Inc was cheaper, and available outside the UK! In my humble opinion, the Nails Inc formula is the best there is in nail polish - outstripping even - dare I say it - RBL. I personally find the consistency smoother in Nails Inc polishes, and the application less streaky. Okay, now I'd better run before the RBL fans stone me.
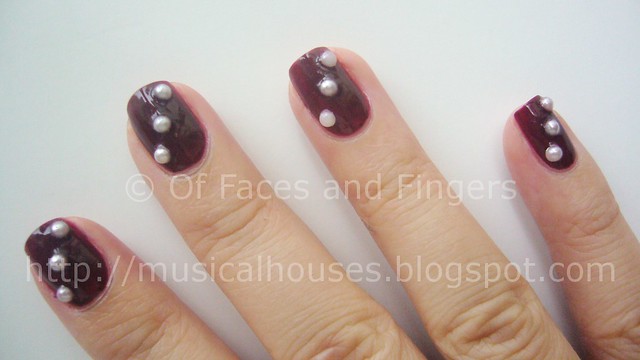
I don't know about you, but I am absolutely loving my nail art, although it was a little more time-consuming than your average manicure. I love the combination of deep red together with white pearls, and I love how it looks classy with the deep red colour, but still a little fun with the pearls! I'm not going to lie - I simply couldn't stop looking at my nails when I had this manicure on.
(Nail art product was sent for review. Review is my complete and honest opinion. I am not affiliated with/compensated by the company.)


It's a simple idea, but very effective!
ReplyDeleteThat's such an awesome idea! Ive never heard of nail pearls :O Do the pearls get in the way?
ReplyDeletepretty~ I think I'll use my spared rhinestones too ^^ thanks for the pic. I think I'm gonna post about nail art too =)
ReplyDeleteOh sigh. When I was first getting into polishes and blogs I got several Nails Incs on your recommendation (and also that back then they were one of the few UK-available brands doing funky colours like greys and beiges!) I find they chip on me like mad, though - we're talking lucky if it lasts 24 hours. I've recently discovered an OPI outlet and they work much better on me (for a weekend away I'll wear OPI just for the joy of not having to retouch!). Plus even with their extortionate UK prices, OPI is the cheaper of the two.
ReplyDeleteLovely colour & mani though, reminds me of Nails Inc Savile Row? x
thats so lovely - definitely going to try it. i always have trouble with the embellishments falling off but will try your topcoating method! xx
ReplyDeleteThis looks absolutely gorguz! And so simple too! Think even someone like moi (who is totally awful at things like this!) can give this a whirl :)
ReplyDeleteThanks hun!
Love Aysh xox
Wow! This looks really lovely!
ReplyDeleteThank you for sharing this great idea. I want to try something like this now! (I just hope I have the patience!!) xx
@Chococurro: They don't get in the way much for me, but then again at work I mostly type with my nails. I guess if that is your concern, smaller-sized embellishments may work better as they don't get in the way as much.
ReplyDelete@Rina: Aww, I'm sorry Nails Inc didn't work out for you. They are one of my favourite brands for polishes, but i guess as with all thinga beauty-related, different brands work best for different people. I usually get my Nails Inc colours in sets, or off EBay as they are cheaper there :) And yes, Nails Inc Saville Row is similar, but I don't think they are dupes. I think Saville Row is a bit darker and a bit more purple. But they're close sisters though :)
im loving the pearls.. very pretty
ReplyDeleteIt's awesome!!!!
ReplyDeleteniceee nail art!
ReplyDeletehttp://lovesljd.blogspot.com/
Hi! I am a new follower!
ReplyDeleteCompliments for your blog!
If you like you can come and visit my blog
http://nuvoledibellezza.blogspot.com/
I would be honored to have you among my followers!
This looks simple but fun!
ReplyDeleteLoving your blog, btw. I am new!! Hope you can check out my blog when you get a chance as well.
-Diana
www.glamappetit.blogspot.com
Pretty and love the water/toothpick tip. I'm a huge nails inc fan too (230+ unique colours!), the formula is generally spot on - don't think I'd go as far as better than RBL though!
ReplyDeleteHaii <3,
ReplyDeleteI really like your nail art ^^! It looks very awesome and I think it's very creatif =P!
xx Katy ^^