Friday, September 28, 2012

Under the Sea Jelly Sandwich Manicure

So the last time I did a jelly sandwich manicure, I was kind of on the fence about it. So I decided to give it another go, to see if I really loved it or not.


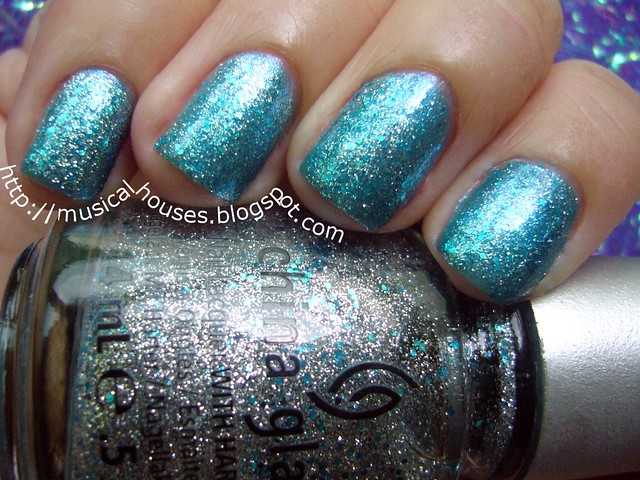
This time, I used China Glaze Lorelai's Tiara, and Nicole by OPI Somebody Teal Love. Yes, I used a Justin Bieber nail polish. No, I am not a fan of Justin Bieber, I'm a little older than his target demographic (although I'm sure if I were 10 years younger and in my early tweens, I'd have such a huge crush on him). Yes, I am ashamed. But it's okay. It's nail polish. At least I didn't buy his CD!

jelly sandwich manicure 2

Anyway, Somebody Teal Love is very, very sheer. Like man-this-is-the-fourth-freaking-coat-of-polish-and-why-am-I-still-seeing-VNL-with-four-freaking-coats kind of sheer. So, I thought it would be perfect for the purpose of a jelly sandwich. Lorelai's Tiara, of course, has all this big happy glitter, and I just love it.

jelly sandwich manicure 3

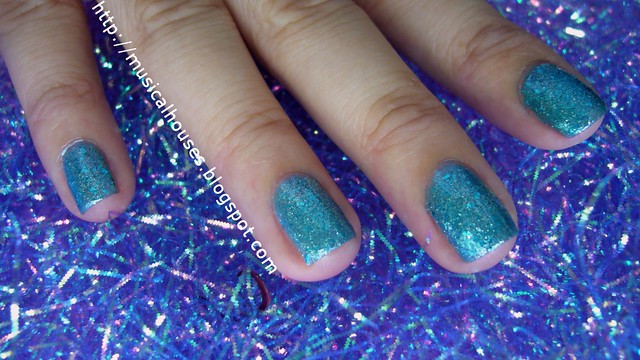
I used 2 coats of Somebody Teal Love as the base, then two coats of Lorelai's Tiara, and 2 coats of Somebody Teal Love. So this mani ended up being a little thicker than I was used to, but I still liked it! I actually quite like this combination, it looks like there are jewels beneath a sea embedded in my nails, twinkling from below the surface... (I'm all waxing poetic now, aren't I?)

jelly sandwich manicure 4

Anyway, I think the jelly manicure may actually be growing on me. I think I just need to experiment with more glitter and jelly types!

Wednesday, September 26, 2012

Homemade Natural Face Scrub Recipe: DIY Skincare!

Guess what guys? I learnt how to make my own DIY face scrub! I actually learnt it at the Bellabox bloggers event recently, and I was so excited, I had to share it with everyone! The following recipe was kindly shared by Petronille Houdart, the founder and the brains behind Petronille, a French brand with very good skincare. She actually formulated Petronille's products (I have one I want to share with you soon), and is extremely knowledgeable about her ingredients, products and everything!

Don't believe me? Look at what I made under her direction!


Here is the recipe she shared:

For 30g of Scrub:

1. Your choice of:
Himalayan Salt: 1.5 cup*, or
Brown Sugar: 1.5 cup*

2. Your choice of:
Sweet Almond Oil: 1 cup*, or
Olive Oil: 1 cup*

3. Your choice of:
Multiflower Honey: 1 tsp, or
Coconut: 1 tsp, (ours was ground into powder) or
Cacao: 1 tsp (what we used was also ground into powder)

4. Your choice of:
Tea Tree Essential Oil: 2 drops, or
Ginger Essential Oil: 2 drops

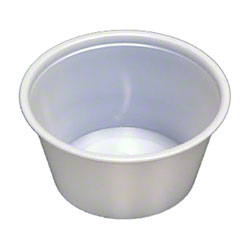
*These aren't actual cooking cups. Because we were only making 30g of scrub, we used much smaller little bowl-like cups, sort of like those you use for jello shots? Sort of like this:


(Image source)


To start off, we cleaned the insides of our little containers with 70% rubbing alcohol to sanitize the containers. Then we began mixing the ingredients in the order as shown above: first the choice of salt/sugar, then the oil, then the honey/coconut/cacao, then the essential oil (not strictly necessary for the scrub, it's more for fragrance), mixing well after each step. To mix, we used simple wooden coffee stirrers.

To me, it seemed like the key to this was getting the right proportion of salt/sugar and oil. Too much salt/sugar and the scrub would be pretty dry, and too much oil and the scrub would be too liquid-y. Using that container of ours, we filled it up to about 3/4 full with the salt/sugar, and then added the oil until the container was pretty much full. And then we stirred and stirred to get the two to mix.

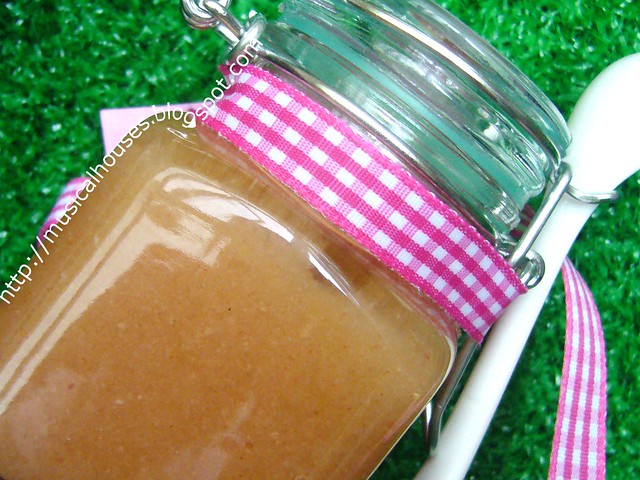
Here's a shot of the bottle of scrub I made close up so you can see the scrub texture. Although there a lot of solid grains in there, they're well mixed up in the oil.

homemade face scrub diy 2

The mixture will last about 2 months or so. According to Petronille, although there are no preservatives added, it will not go bad, because there is no water (everything is oil and other solids). She also added that it would make a great gift, if you ever do it yourself, because it's cheap, yet a very thoughtful idea, and I have to agree - if you've got a friend who's a skincare nut, this would be a perfect gift!

And there you have it - the most awesome thing I've learnt with regards to DIY skincare so far! (Thanks Petronille!) If anyone gets to try out the recipe at home, let me know your thoughts!

Monday, September 24, 2012

Elianto Burnt Umber: Rich Autumn in a Nail Polish!

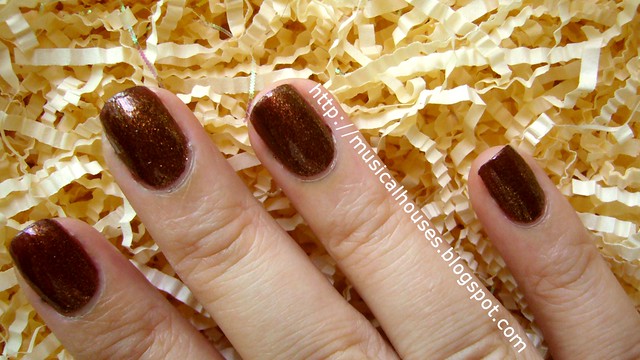
So I have on my nails Elianto Burnt Umber, and all I have to say is, OMG this is one gorgeous polish. Yeah sure it's brown, but it's not an ugly, poopy kinda brown. This one is so beautiful and wearable it just pops out at you! I previously blogged about this polish (and a few other things) in my haul post from a super long time ago, and I'm only starting to wear it now!


See what I mean? Unfortunately it was already late afternoon when I painted my nails, so you guys won't get to see this baby sparkling in all it's glory. But this is good too - its pretty from any angle! I bought this like eons ago in the polish fanatic's world (in the real world it's more like one year, but the polish world moves quickly), and I only just got around to trying it.

elianto burnt umber nail polish 2

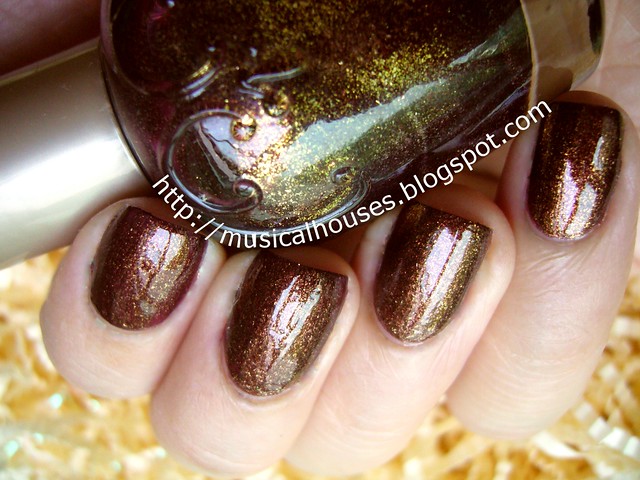
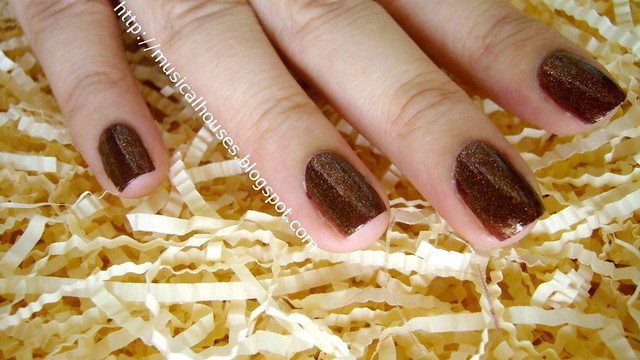
Burnt Umber is a rusty browned-burgundy base, with loads of gold and (I think) orange shimmer. This mix of colours is what makes it amazing. In most lights it looks like a rusty brown with rich gold shimmer, but sometimes I feel like it looks slightly more burgundy instead. From some angles, I even see some sort of green tinge to the glitter, although it doesn't translate as well on the nail.

And the best thing is, because Burnt Umber isn't like, brown brown, but reddish brown, it's incredibly flattering on my hands and fingers. I imagine the fact that it leans red makes it more wearable (I mean, red is a classic colour for nail polish, right?). And the shimmer really makes the shade look so luxe. It even looks good in indoor lights because the shimmer reflects the light and catches the eye.

elianto burnt umber nail polish 1

Application was also a breeze. I didn't have any major application issues, and two coats gave full opacity. The polish pretty much applied itself. I have to say, if all of Elianto's polishes apply this way, I need to get them alllll. What's not to like? I tried this with my PVA glue base coat (Elmer's glue), and it stayed on pretty well! At the end of the 4th day, I wa starting to get a few chips at the corners of my nails - which is pretty good for me, since I usually get chips into my 3rd or 4th day. It could have lasted longer, but I got impatient and peeled it off.

eilanto burnt umber nail polish 3

The autumnal look of the polish, as well as its fantastic shimmer, was what made me try it on (albeit one year later!), and I find I'm really loving it! It kinda looks like the colour of falling leaves to me. Anyone else loving rich colours like this one?

Saturday, September 22, 2012

Benta Berry G-1 Facial Wash: Gentle and Basic

Benta Berry is a French skincare brand that has recently come to Singapore. The brand has a very interesting backstory - apparently the founder, Marie-Pierre Schmitz, created Benta Berry to provide a skincare line for her son when store-stocked lines didn't do. And the brand seems to have taken the idea that it was created for youth to heart with its marketing.


Of course, the backstory and marketing is one thing, the actual product itself is another. And although I was less than keen on the Benta Berry G-1 Moisturizing Face Cream for Boys and Girls, I actually like the Benta Berry G-1 Facial Wash for Boys and Girls much better.

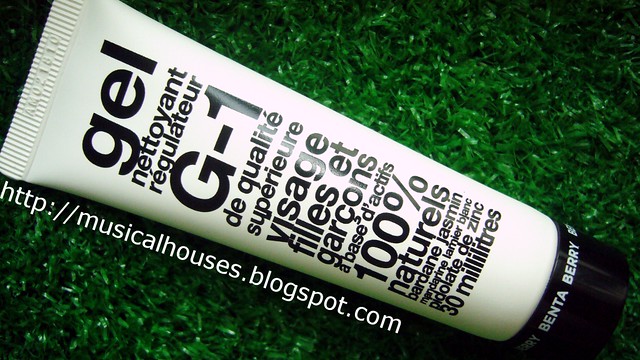
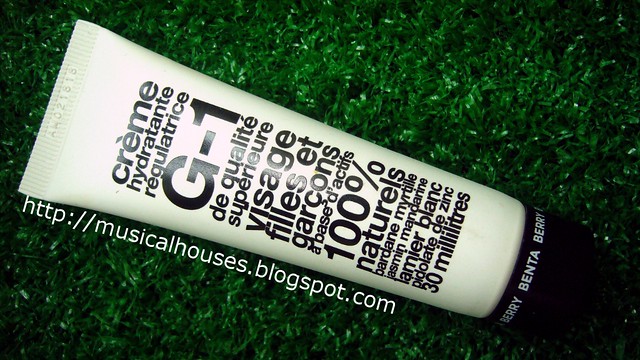
Like the G-1 Moisturizing Face Cream, the G-1 Facial Wash also comes in the same sleek, small tube. The G-1 Facial Wash is a gel cleanser, that looks slightly yellow out of the tube.

benta berry g1 facial wash tube

The gel is slightly heavy in texture, and feels kinda like Cetaphil or similar cleansers, in that it doesn't foam much because it doesn't have very strong surfactants in it (surfactants are the ingredients that create the foam in your face wash, and this includes ingredients like SLS and SLES). This makes it pretty ideal for sensitive skin. (Yes, when I review skincare I go into the ingredients because I'm crazy like that. :P You know me by now!)

benta berry g1 facial wash gel

Since we're on the oh-so-fascinating topic of ingredients, let's take a look at the ingredients list, shall we? (What, you don't like reading the ingredients list? Too bad! :P Muahaha!) The good thing is, if you look at the main ingredients that make up most of the product, it actually isn't too bad:

aqua /water, sodium cocoamphoacetate, glycerin, cocamidopropylbetaine, carbomer, coco glucoside and glyceryl oleate, caprylhydroxamic acid, etc

benta berry g1 facial wash ingredients

The surfactants used (primarily sodium cocoamphoacetate, cocamidopropylbetaine, and coco glucoside) are mild, and the company does seem to try to live up to its "natural ingredients" billing by putting plant-derived ingredients (all three surfactants could be derived from coconut and other plants) . The rest of the main ingredients (carbomer, glyceryl oleate, caprylhydroxamic acid etc) serve other functions - as thickeners, emulsifiers, chelating agents and so on.

So I guess essentially you're getting a good basic face cleanser that's gentle on the skin, won't cause pimples, and won't dry out your skin, but not much more - don't expect bells and whistles on this! This was also borne out by my own use of the product - looking at the ingredients list, I can see why the product works the way it does.

So would I recommend this product? If you want a no-nonsense, no-frills basic cleanser that's gentle and won't dry out or clog up your skin, and is made of natural ingredients, the Benta Berry G-1 Facial Wash would b worth looking at. But given the price point (S$20 for a measly 30ml), I feel that you'd get more bang for your buck buying Cetaphil or a similar product (that is, if you don't mind that Cetaphil and other alternatives use less natural ingredients..

(Product was sent for review. Review is my complete and honest opinion. I am not affiliated with/compensated by the company. Obviously, since you can tell from this review. )

Thursday, September 20, 2012

Nubar Night Sparkle: Glitter Made Glamorous

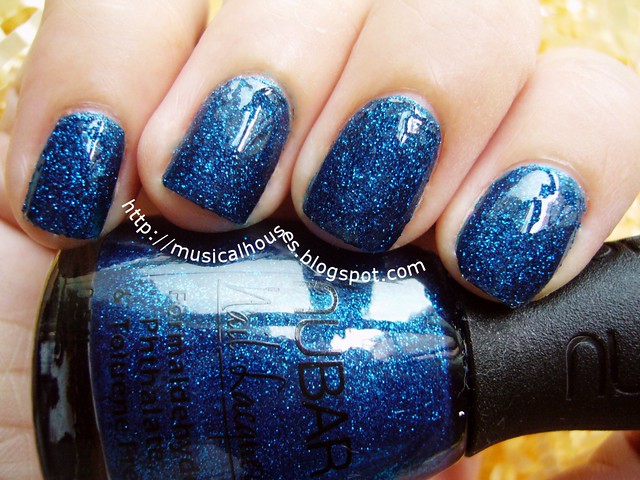
So remember how in a previous post, I showed you guys how awesome my experimental PVA glue base coat was? Well some of you may recall the nail polish I used for demonstrating the base coat - Nubar Night Glitter! Well I loved it so much, I decided Night Glitter needed its own post!

nubar twilight essence peel off base coat dupe pva glue

Nubar Night Glitter isn't really the type of polish I would have bought at first glance, but I received this in a swap, and I'm glad I did! Because it looks so much more impressive on the nail than in the bottle.

nubar night sparkle nail polish glitter 2

In the bottle, Night Glitter looks somewhat boring, compared to the fancy-schmamcy glitters you see nowadays. For one, all the glitter is the same shape. And size. And colour. But once I painted my nails with it, I could totally see why it was the standout of the entire Nubar Sparkle collection. Because it's just so darn friggin' gorgeous.


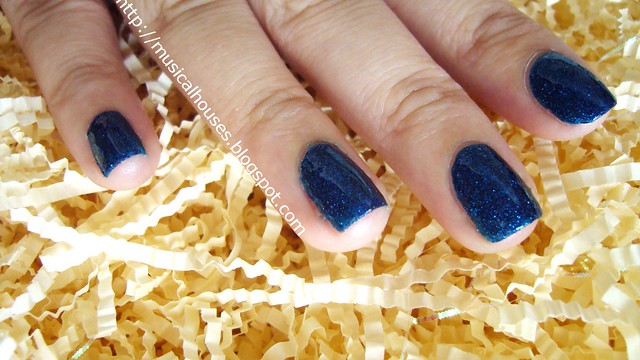
On the nail, Nubar Night Sparkle is a very pretty royal blue glitter that twinkles and sparkles like the night sky. It always looks visibly blue, and although it sparkles more in the sun, it equally beautiful in the shade. The light reflecting off the glitter is indeed a beautiful sight. It looks like a gemstone on my nails! The name Night Sparkle is quite apt in the case of this polish. Night in a gemstone. Me likey.

nubar night sparkle nail polish glitter 3

I also didn't have any application issues. The texture was slightly thick (like most glitter polishes), but the glitter was dense enough that two costs gave good opacity, and there wasn't much glitter clumping. You don't have to layer these, I think they're really better worn alone.

nubar night sparkle nail polish glitter 4

The best thing I love about Nubar Night Sparkle? Although it was originally released in Spring 2010, it's pretty much something you can wear year round, not just Spring. The glitter is perfect for summer days when you want some glitter that catches the sunlight and don't feel like a neon/bright shade, and the deep blue shade goes well for Fall/Winter too. And heck, it's pretty enough to wear year-round, whether you follow those colour fashion trends or not. Now let me smack myself for waiting 2 years to open my dusty bottle!

Tuesday, September 18, 2012

Sticky Nars Case? How To Clean It (Without Ruining It)!

A long time back (almost two years back, in fact), I made a post on how to clean a sticky NARS case. Basically, this involved the use of alcohol to remove the rubberized part that has disintegrated. While it worked, this method of cleaning the case results in any logos or printing on the rubberized surface being removed as well. So unfortunately NARS logos on the compact will be affected, if the part the logo is printed on has deteriorated so much that alcohol cleaning removes the print. However other brands that don't print designs or logos on the rubberized portion of the compact, like Smashbox or Becca, should be unaffected.

Thus, begins the problem - how does a girl with NARS products clean them, without removing the logo? That time, a commenter on my blog mentioned that using a silicon-based lubricant instead of alcohol to clean the casing helps to solve this problem. Then a brainwave struck - I may not have silicone lube, but I do have silica powder! And if the silicone is indeed the magic ingredient, then it shouldn't matter too much whether I get it in a powder or liquid form. Ergo, with my silicon powder, I should be able to de-stickify my NARS compact! So, I set to work.

cleaning sticky nars compact before

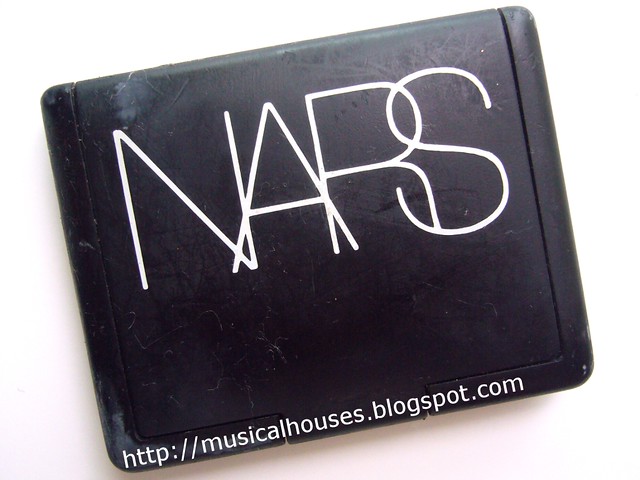
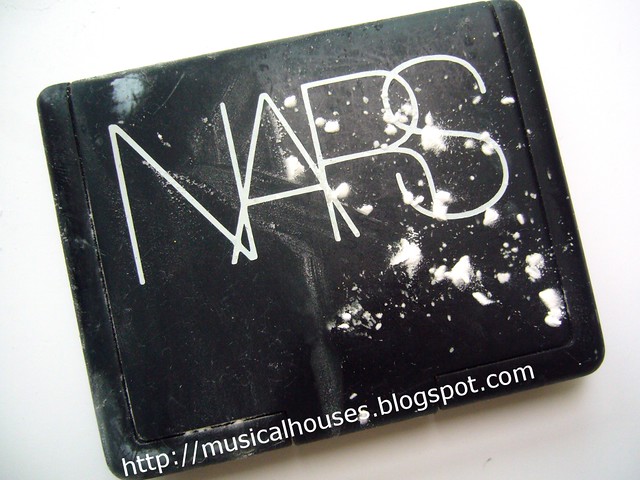
First, I started off with a NARS case. This here is my NARS Tokyo Eyeshadow Duo. It's been cleaned to remove most of the debris and dust that was stuck to the case, but it's still very sticky to the touch. Yuck.

cleaning nars sticky compact silica powder

Then, I got out my secret weapon - silica powder! Mine is decanted into the MUFE HD Powder container, among others, but I really just get mine from Coastal Scents, and I get a huge bag for quite cheap.


I was worried I'd ruin my case even more, I won't lie. But I figured - hey, if it works, it's a great thing, and if it doesn't work, then, well, lots of things I've tried before haven't worked - water, soap, wet wipes, so this will just be one more on the list. So I began, rather cautiously, putting a bit of silica powder on the case. I decided I would go slow, and test a small surface first. So I started with the backside of the case (noone except me is going to see that part), and I rubbed some of the silica powder onto the case.

cleaning sticky nars compact comparison

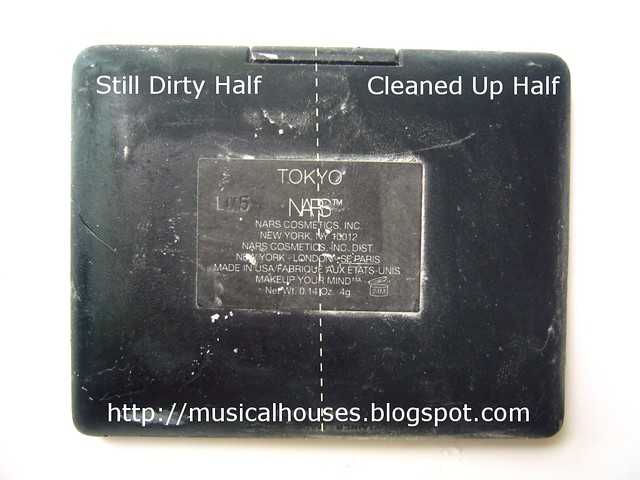
And then, I inspected my work so far, looking at the back of the casing. Not bad. It actually works! The case may feel a little powdery, but at least it's not sticky and gross anymore. Good thing I used silica powder, since that is transparent. If the powder was coloured, it might have coloured the case too! You can see the right side of the case (which was treated with silica powder) isn't sticky anymore, whereas the left side of the case (which hasn't yet had silica powder applied to it) is still sticky.

cleaning sticky nars compact front

Emboldened, I finished powdering over the base of the NARS case. I waited for the world to explode. Nothing happened, and my NARS case was safe. So I put it on the front of the NARS case. And then I began spreading the powder evenly over the casing:

cleaning sticky nars compact process

And viola! I had a non-sticky NARS case! And the logo is still intact! And it feels just like a new NARS case too!

The importing thing to note is that you have to remove as much of the debris from the case before you spread powder on it. Any remaining debris will get trapped when the powder is applied and show up on your finished product. I'm not sure how exactly this method works - I'm guessing the silica powder sort of absorbs the stickiness and forms a coating over the deterioriated packaging that restores it to its previous state. And I'm also not sure if you can use just normal powder. I used silica powder because the suggestion by a reader was for silicon-based lube, so it seemed like the right ingredient to use. I imagine some types of normal powder could just cause more dust on the casing, but I can't verify it until I try it out one day.

cleaning sticky nars compact after

So there you have it - the most aesthetically pleasing solution I've come across for cleaning up a sticky NARS (or Smashbox or Becca) packaging so far! This doesn't remove the rubberized packaging unlike the alcohol method, and it won't wipe away your NARS logo that's printed on the packaging. I'm so glad the experiment worked out - I would have hated to ruin my NARS duo!

Sunday, September 16, 2012

Bellabox Event: I Made My Own BellaBox!

Edited to Add: Originally when I made the post below, I thought this was going to be the upcoming October Bellabox. Turns out it's not, and the October Bellabox is still a surprise. Nevertheless, I think it'll be great!

This month's Bellabox is going to be great, and all for a number of reasons - it's value for money (meaning you're not just going to get a bunch of teeny samples in packets), it's got some big brand names, and it's got a good mix of items! I was at the Bellabox blogger's event earlier last week, and I got a sneek peek at the upcoming box.

I know it looks a little puny like this, but that's because the box given to us at the event didn't have the usual packaging material (makes sense, right, since it wasn't being mailed over).


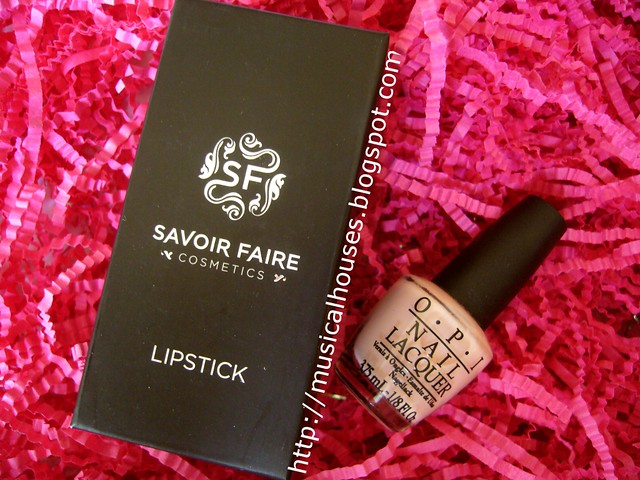
First up, I got a full-sized Savoir Faire Lipstick in Miss You, along with a small OPI mini (I'm not sure what colour this is - light sheer-looking pink with no shimmer whatsoever - anyone want to suggest a name?). I love this. I love makeup and nail polish, so I'm happy.

bellabox october savoir faire lipstick opi polish

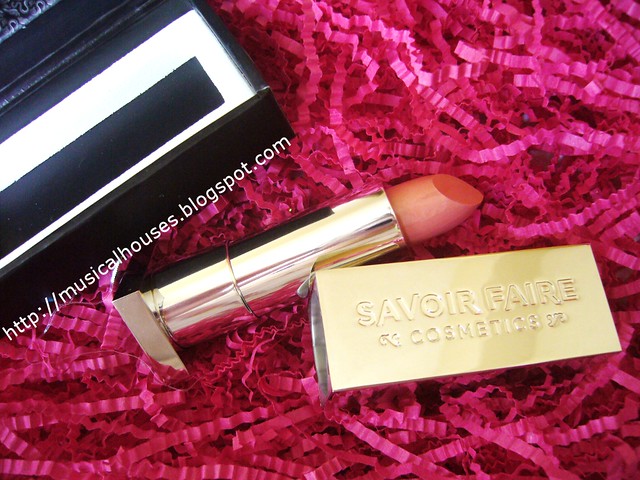
But what really impressed me was the addition of the Savoir Faire Lipstick. These things are S$64 a pop, so I guess if you get a colour you like, this box will be more than worth it for you! Miss You, the colour the bloggers got, is a light peachy pink with shimmer. I imagine it would be a great nude lip look on fair-to-medium skins. And man, look at the packaging! Sleek and very luxe-feeling.

bellabox october savoir faire lipstick

Also, haircare. I also got an Aveda sample of some of their new ranges, the Invati, which is meant to help thinning hair. This isn't a large-sized sample - it's probably good for one or two uses. Not sure how helpful that is because I imagine you'd need to try shampoo/haircare for at least a week or two to determine how effective it is, right? So it's the least favourite of my samples, but I guess I can't complain, after the Savoir Faire lipstick.

bellabox october aveda shampoo

Lastly, skincare. I got some Caudalie skincare samples, also from their latest Vinosource range. I got a Caudalie Vinosource serum and hydrating cream. I also got Lemongrass House Liquid Hand Soap. Lemongrass House has very aromatic products, so if you're into nice-smelling stuff (e.g. if you're a Lush fan), you should check out their stuff.

bellabox caudalie and lemongrass house

All in all, this box is really mostly samples, offset by the inclusion of the seriously awesome Savoir Faire lipstick. My verdict? If you want the lipstick, this is going to be a stellar buy. Else, it might not be your cup of tea (but seriously, getting a $64 lipstick for $20? Who wouldn't want that?).

(Product was sent for review. Review is my complete and honest opinion. I am not affiliated with/compensated by the company.)

Friday, September 14, 2012

Lip Pure Honey Lemon Lip Gel and Fragrance Free Lip Balm Review

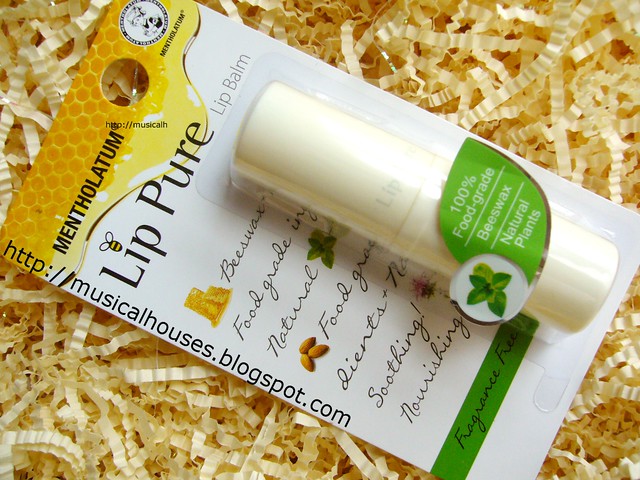
Mentholatum, the healthcare company which owns a range of notable drugstore brands, including SunPlay and Hada Labo, has released two new products, the Lip Pure Honey Lemon Lip Gel and Lip Pure Fragrance Free Lip Balm. These are offered as a more natural alternative for lip balm consumers.


While the "natural" label is often a gimmick, I feel like the Lip Pure's two new offerings are actually pretty good. The Lip Pure Fragrance Free Lip Balm has macadamia seed oil and jojoba oil as the first two ingredients, followed by beeswax, while the Lip Pure Honey Lemon Lip Gel has Jojoba Seed Oil in the first five ingredients. So both havee quite solid ingredients lists.

lip pure fragrance free lip balm

The Lip Pure Fragrance Free Lip Balm is pretty good - it's your carry-it-with-you, fuss-free lip balm in a tube. It's basic, and has no scent or colour, and is a staple. But the Honey Lemon Lip Gel is a little more interesting to me, so I'll talk a bit more about that.

lip pure honey lemon lip gel

Now, why is the Lip Pure Lip Gel so interesting to me? Because it has shimmer! Not a lot, mind you, just the barest hint of gold shimmer. I was trying to apply it to my lip and take a photo, but I wasn't very successful. I swear the shimmer is in there!

lip pure honey lemon lip gel swatch

This makes the Honey Lemon Lip Gel very nifty over lipstick and lip colour. I think it would be especially kick-ass over red lipstick. Here's a quick snap of the Honey Lemon Lip Gel over a matte red lipstick (Rouge Bunny Rouge's Raw Silence, if you're wondering). Much to my chagrin, I still can't get the shimmer to photograph properly. But it's in there!

lip pure honey lemon lip gel red lipstick

Would I recommend these? Well, why not? They're less than S$10 a pop, and they do what they say they do, and the Honey Lemon Lip Gel in particular has very pretty gold shimmer. If you're in the market for a lip balm, you could check these out.

(Product was sent for review. Review is my complete and honest opinion. I am not affiliated with/compensated by the company.)

Wednesday, September 12, 2012

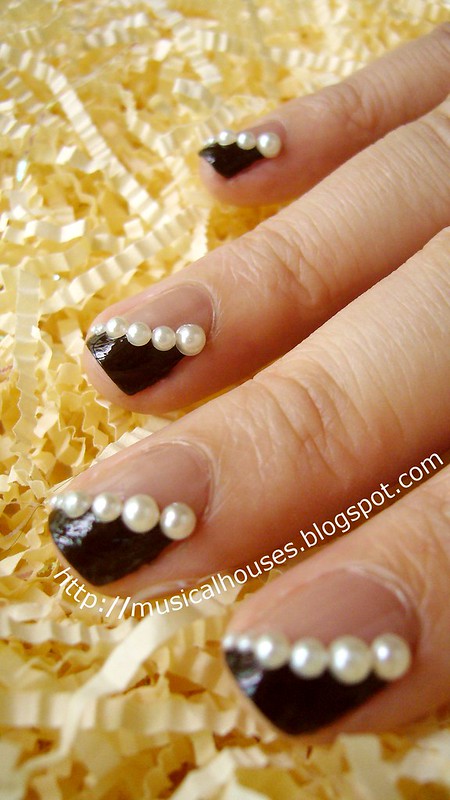
Fall/Winter 2012 Nails: Classic Nude, Brown and Pearls

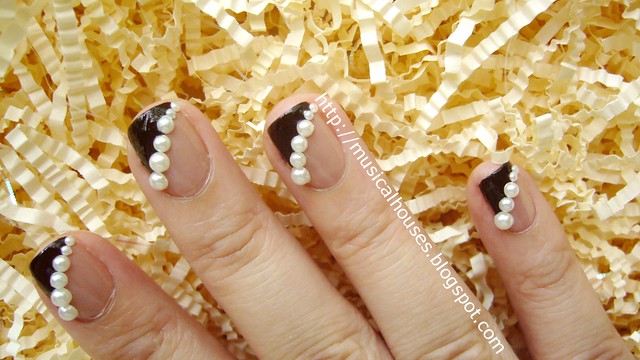
In my last post, I commented that this season's Fall/Winter 2012 nail trends were kinda boring, especially where colours were concerned, since this season's shades were mostly all dark vampies and fleshtone neutrals. So, I set out to jazz it up with a little bling, while still retaining some element of its classic, timeless feel. And here is the result - classic bling, in the form of pearls!


For inspiration, I actualaly looked at this modified french manicure, with a nude base and a vampy tip. It was making the rounds on the runway as part of the Fall/Winter 2012 trends this year. When I saw the look, I thought to myself, "That's a classic colour scheme, but I wonder if I could do something to it - it looks like it could use a teeny bit of bling."

(Source: Vogue)

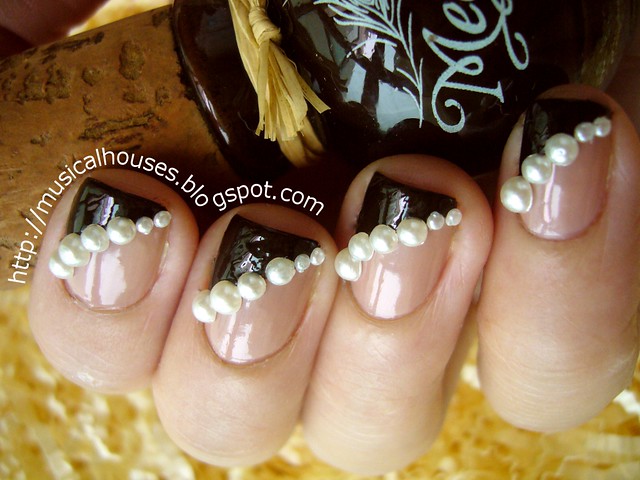
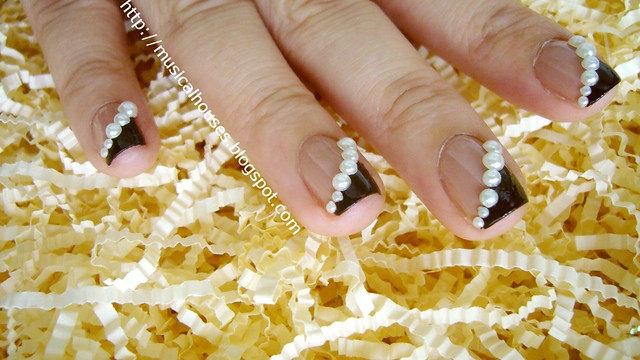
So, I did just that! I retained the colour scheme - don't wanna mess with a good thing too much - but added the pearls, and changed the shape of the painted tip.

fall winter nail art pearls rimmel beige style megan miller ganache 3

For the base, I used Rimmel Beige Style, which is seriously one of the most underrated polishes out there. It's cheap, available, and a classic shade that would probably look good on most people. Beige Style is a fleshtone nude creme (I think it's a creme anyway - it has the slightest of shimmer in the bottle that doesn't show up on the nail). For the nail tip, I used Megan Miller Ganache, which is a rich chocolate brown creme. I basically free-handed the curved tip using Ganache. It doesn't have to be THAT neat because the smile line will be covered by the pearls.

fall winter nail art pearls rimmel beige style megan miller ganache 2

Can I digress a little at this point? I love Megan Miller polishes - the two I have are fantastic in terms of colour payoff, texture, and brush shape/size, but man, I really hate the bottles. The cork cap really annoys me to no end, because fluff and dirt and dust get onto the cap really badly. I have to like, do some dust removal every now and then. I think my cork cap is eventually going to get all moldy and gross (I live in a very hot and very humid climate near the equator), and I'm not looking forward to it. But anyway, moving on.

fall winter nail art pearls rimmel beige style megan miller ganache 5

For the pearls, I used three different sizes of pearls and aligned them along the smile line from large to small. For handling of the pearls, I used the ever-helpful wet toothpick tip - basically you dip the tip of a toothpick in water, and the wet toothpick will pick up the pearls due to the surface tension of the water. When the pearl touches the wet nail polish, the pearl will stick to the polish. Much easier than using tweezers!

fall winter nail art pearls rimmel beige style megan miller ganache 4

Anyway, this is my slightly-more-blinged-up-but-still-classic take on this Fall/Winter's French manicure. I'm really liking it, as it's easy to do, and looks great, even if you aren't into crazy nail art. In fact, my non-nail-polishaholic sister commented that she actually liked this look! I think it would be great to try this with other colour schemes too.

Monday, September 10, 2012

Benta Berry G-1 Review: Moisturizing Face Cream

Benta Berry, a French skincare brand, was recently launched in Singapore a couple of months back. Marie-Pierre Schmitz, the founder of Benta Berry was inspired to create a skincare line for her son when store-stocked lines didn't do. I was at Benta Berry's launch, and it seemed to hit all the right notes: it's a brand for young skins (age 12-24, which I guess makes me just out of their age range), it's based on natural ingredients, claims to have been rigorously formulated, and the backstory about Marie-Pierre (who, by the way, is a stunningly gorgeous woman) starting the brand to develop suitable skincare for her son was such a sweet one. And to emphasize the youthful image of the brand, their brand ambassadors are all young people, including a dance group and an army guy.


If only the products worked as well as the marketing. Now not all the products are bad of course - like any brand Benta Berry has its hits and misses - but as a blogger, I feel like I owe it to my readers to relate my experiences with the product honestly. And sadly, I can't recommend the Benta Berry G-1 Moisturizing Face Cream for Boys and Girls. I just didn't like it when I tried it.

benta berry g1 face moisturizing cream tube

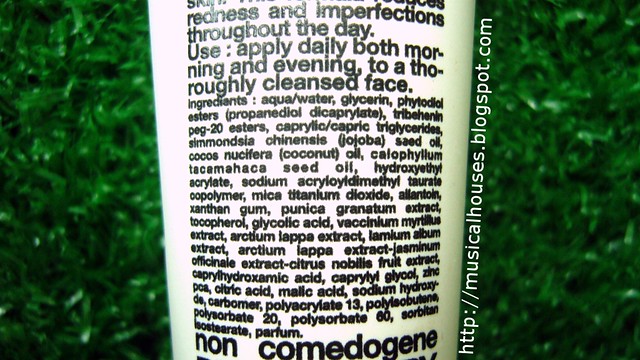
Why didn't I like the Moisturizing Face Cream? Well, the ingredients for starters. The ingredients list is pretty long, but since ingredients are listed in order of descending amount, I typically look at the first 5-7 ingredients on the list, since they make up most of the product. Here's the first 10:

aqua/water, glycerin, phytodiol esters (propanediol dicaprylate), tribehenin peg-20 esters, caprylic/capric triglycerides, simmondsia chinensis (jojoba) seed oil, cocos nucifera (coconut) oil, calophyllum tacamahaca seed oil, hydroxyethyl acrylate, sodium acryloyldimethyl taurate copolymer, etc etc

First off, the product has coconut oil (bolded) as the 7th ingredient. Coconut oil is highly comedogenic, so I'm not sure why it's in a product meant for young adults and teenagers, who ate probably at a more breakout-prone stage in their life. But since it's in 7th place, perhaps the concentration of coconut oil isn't large enough to really exacerbate or cause acne. Still, if you have sensitive and acne-prone skin, like me, this isn't a good sign.

benta berry g1 face moisturizing cream ingredients

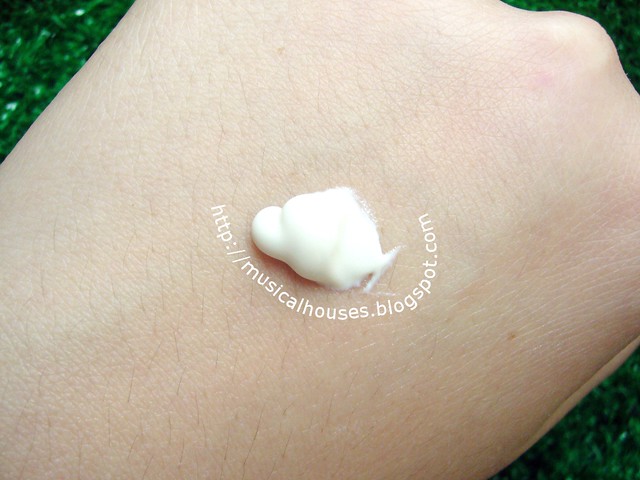
Next, the product wasn't very cosmetically elegant to use. When I put it on a dry, cleansed face, the G-1 Moisturizing Cream started to ball and peel in some areas, leaving me with this small bits of white residue on various parts of my face. Ugh. Sometimes balling/peeling occur, but it usually happens when two products are layered (e.g. when a moisturizer doesn't want to be friends with my sunscreen). It doesn't usually happen when the product is applied alone to a dry face. So I didn't really like it for that reason - I had to spend an extra few minutes blending the little white film into my face. The strange thing, though, is that when I tried testing it on the back of my hand, I didn't get such balling/peeling. I'm not sure why.

benta berry g1 face moisturizing cream

The good thing about this product, though, is that it's got a nice texture (other than the balling/peeling part), because it's creamy in texture, but still light enough for everyday wear. If it didn't ball/peel I would have said it would probably work well under makeup. Another good thing is the tube packaging, which is not only travel-friendly and sleek, but also more hygienic than jars.

So, would I recommend this? Well, maybe, if you're not sensitive to coconut oil, and if you can cope with the balling/peeling. Otherwise, while I liked the marketing and sleek packaging, I found it hard to love this product. The price point (S$33.90 for a tiny 30ml tube) didn't help either.

(Product was sent for review. Review is my complete and honest opinion. I am not affiliated with/compensated by the company. Obviously, since the PR folks sent me something to review and I said I didn't like it!)

Saturday, September 8, 2012

Autumn/Winter 2012/2013 Nail Trends: Not Impressed! Yawn.

You know that although I don't really follow trends all that much, I do like to see what happens on the catwalk - I like taking a look at which trends are showcased, and the different designers' takes on the trends. I'm not talking about the clothes of course, or even the makeup (although I watch that with interest too), I'm talking about nails!

This year, the Fall/Winter 2012-2013 nail trends are just so yawn-inducing, I found myself thinking "Dammit, that's boring" and "Sheesh, I've seen that a gazillion times done by other bloggers". Let me give you three reasons why:

1. The "Oops, I Ruined My Mani Look" is in Again

Sigh. I just hope this doesn't spark a rush of copycat blogposts. The last time some celebrity wore the "I ruined my mani" look in a magazine, it was all over my Google Reader. I'm a bit of a traditionalist in that I like my nails to look like painted nails, not ruined manicures passing off as artistic statements. To me, it's one of those "works for the runway, not for me" type things. Nice silver colour, though, very sleek. Does it even look a little holographic?

(Source: Vogue)

2. Shatter and Crackle Nail Polish (Or Stuff That Looks Like It)

Come on guys, you're supposed to be like the pinnacle of the fashion world, right? Shatters and crackles are so, like, two years ago. This is defiitely a yawn for me. I'm not sure exactly what was used to make that thing below, but man, it sure looks like plain ol' black crackle polish. (I just learned it's called croc nails from a reader who commented below. Thanks Joanna! The nails though - sheesh. Almost the same thing, just a different name.) Boring. Next!

(Source: Vogue)


3. Boring Colours and Combinations

For fall, the look seems to be - you guessed it, deep dark vampy shades, and nudes, and some new neutrals (like grey). Yawn. I mean, for sure these are classic shades, but man, I was hoping that with the Pantone colour palette for Fall including some kick-ass shades (Olympian Blue, Bright Chartreuse), the nails would be something a little more bright, colour-wise.

Even the nail art was boring. There was minx (which is cool, but not if you're a polish lover like me), and then there was stuff like this: Nude and black (or in this case, dark brown) french tips for nail art. That's a french manicure with a dark tip. I've seen this done before on so many blogs. It's a nice look, but not groundbreaking or anything.

(Source: Vogue)

And then there's this. I can't figure out what it is. It looks like a deep vampy base (or possibly even black, hard to tell in that lighting), with random strips of grey painted on it. Still, it looks sort of cool, I guess:

(Source: Vogue)

Okay, not all of it was bad. There were pops of colour here and there, primarily blue (must be Olympian Blue). Some fashion houses got lazy and just painted the nails straight-up blue. Some, this, got a little more interesting, and even did all-out nail art. This was the highlight for me, I guess.

(Source: Vogue)

(Source: Vogue)

So, this is why I'm totally not impressed with the nail trends as seen on the runway for Fall/Winter 2012. Despite all the hoo-ha that surrounds Fashion Week, I really only have one response:

(Source)

(For the record though, I absolutely love MaKayla Maroney. Falling on your butt and STILL getting an Olympic silver medal? That's still quite the acheivement in my book!)